
| 일 | 월 | 화 | 수 | 목 | 금 | 토 |
|---|---|---|---|---|---|---|
| 1 | 2 | 3 | 4 | |||
| 5 | 6 | 7 | 8 | 9 | 10 | 11 |
| 12 | 13 | 14 | 15 | 16 | 17 | 18 |
| 19 | 20 | 21 | 22 | 23 | 24 | 25 |
| 26 | 27 | 28 | 29 | 30 | 31 |
- 메모리접속불량
- 윈도우10
- 동탄컴퓨터
- 회수실적
- 컴퓨터불량
- 현대카드
- 컴퓨터수리
- 신한카드
- 삼성노트북
- 배드섹터
- ssd업그레이드
- 노트북수리
- 국민카드
- 컴퓨터 고장
- M.2 SSD
- 이용실적
- lg노트북
- 윈도우7
- 파워서플라이
- 아파트관리비
- 노트북 업그레이드
- 윈도우10 설치
- 동탄컴퓨터수리
- 컴퓨터고장
- 전원공급장치
- 컴퓨터
- 느린 노트북
- 노트북
- 컴퓨터수리점
- 동탄노트북업그레이드
- Today
- Total
2동탄컴퓨터수리
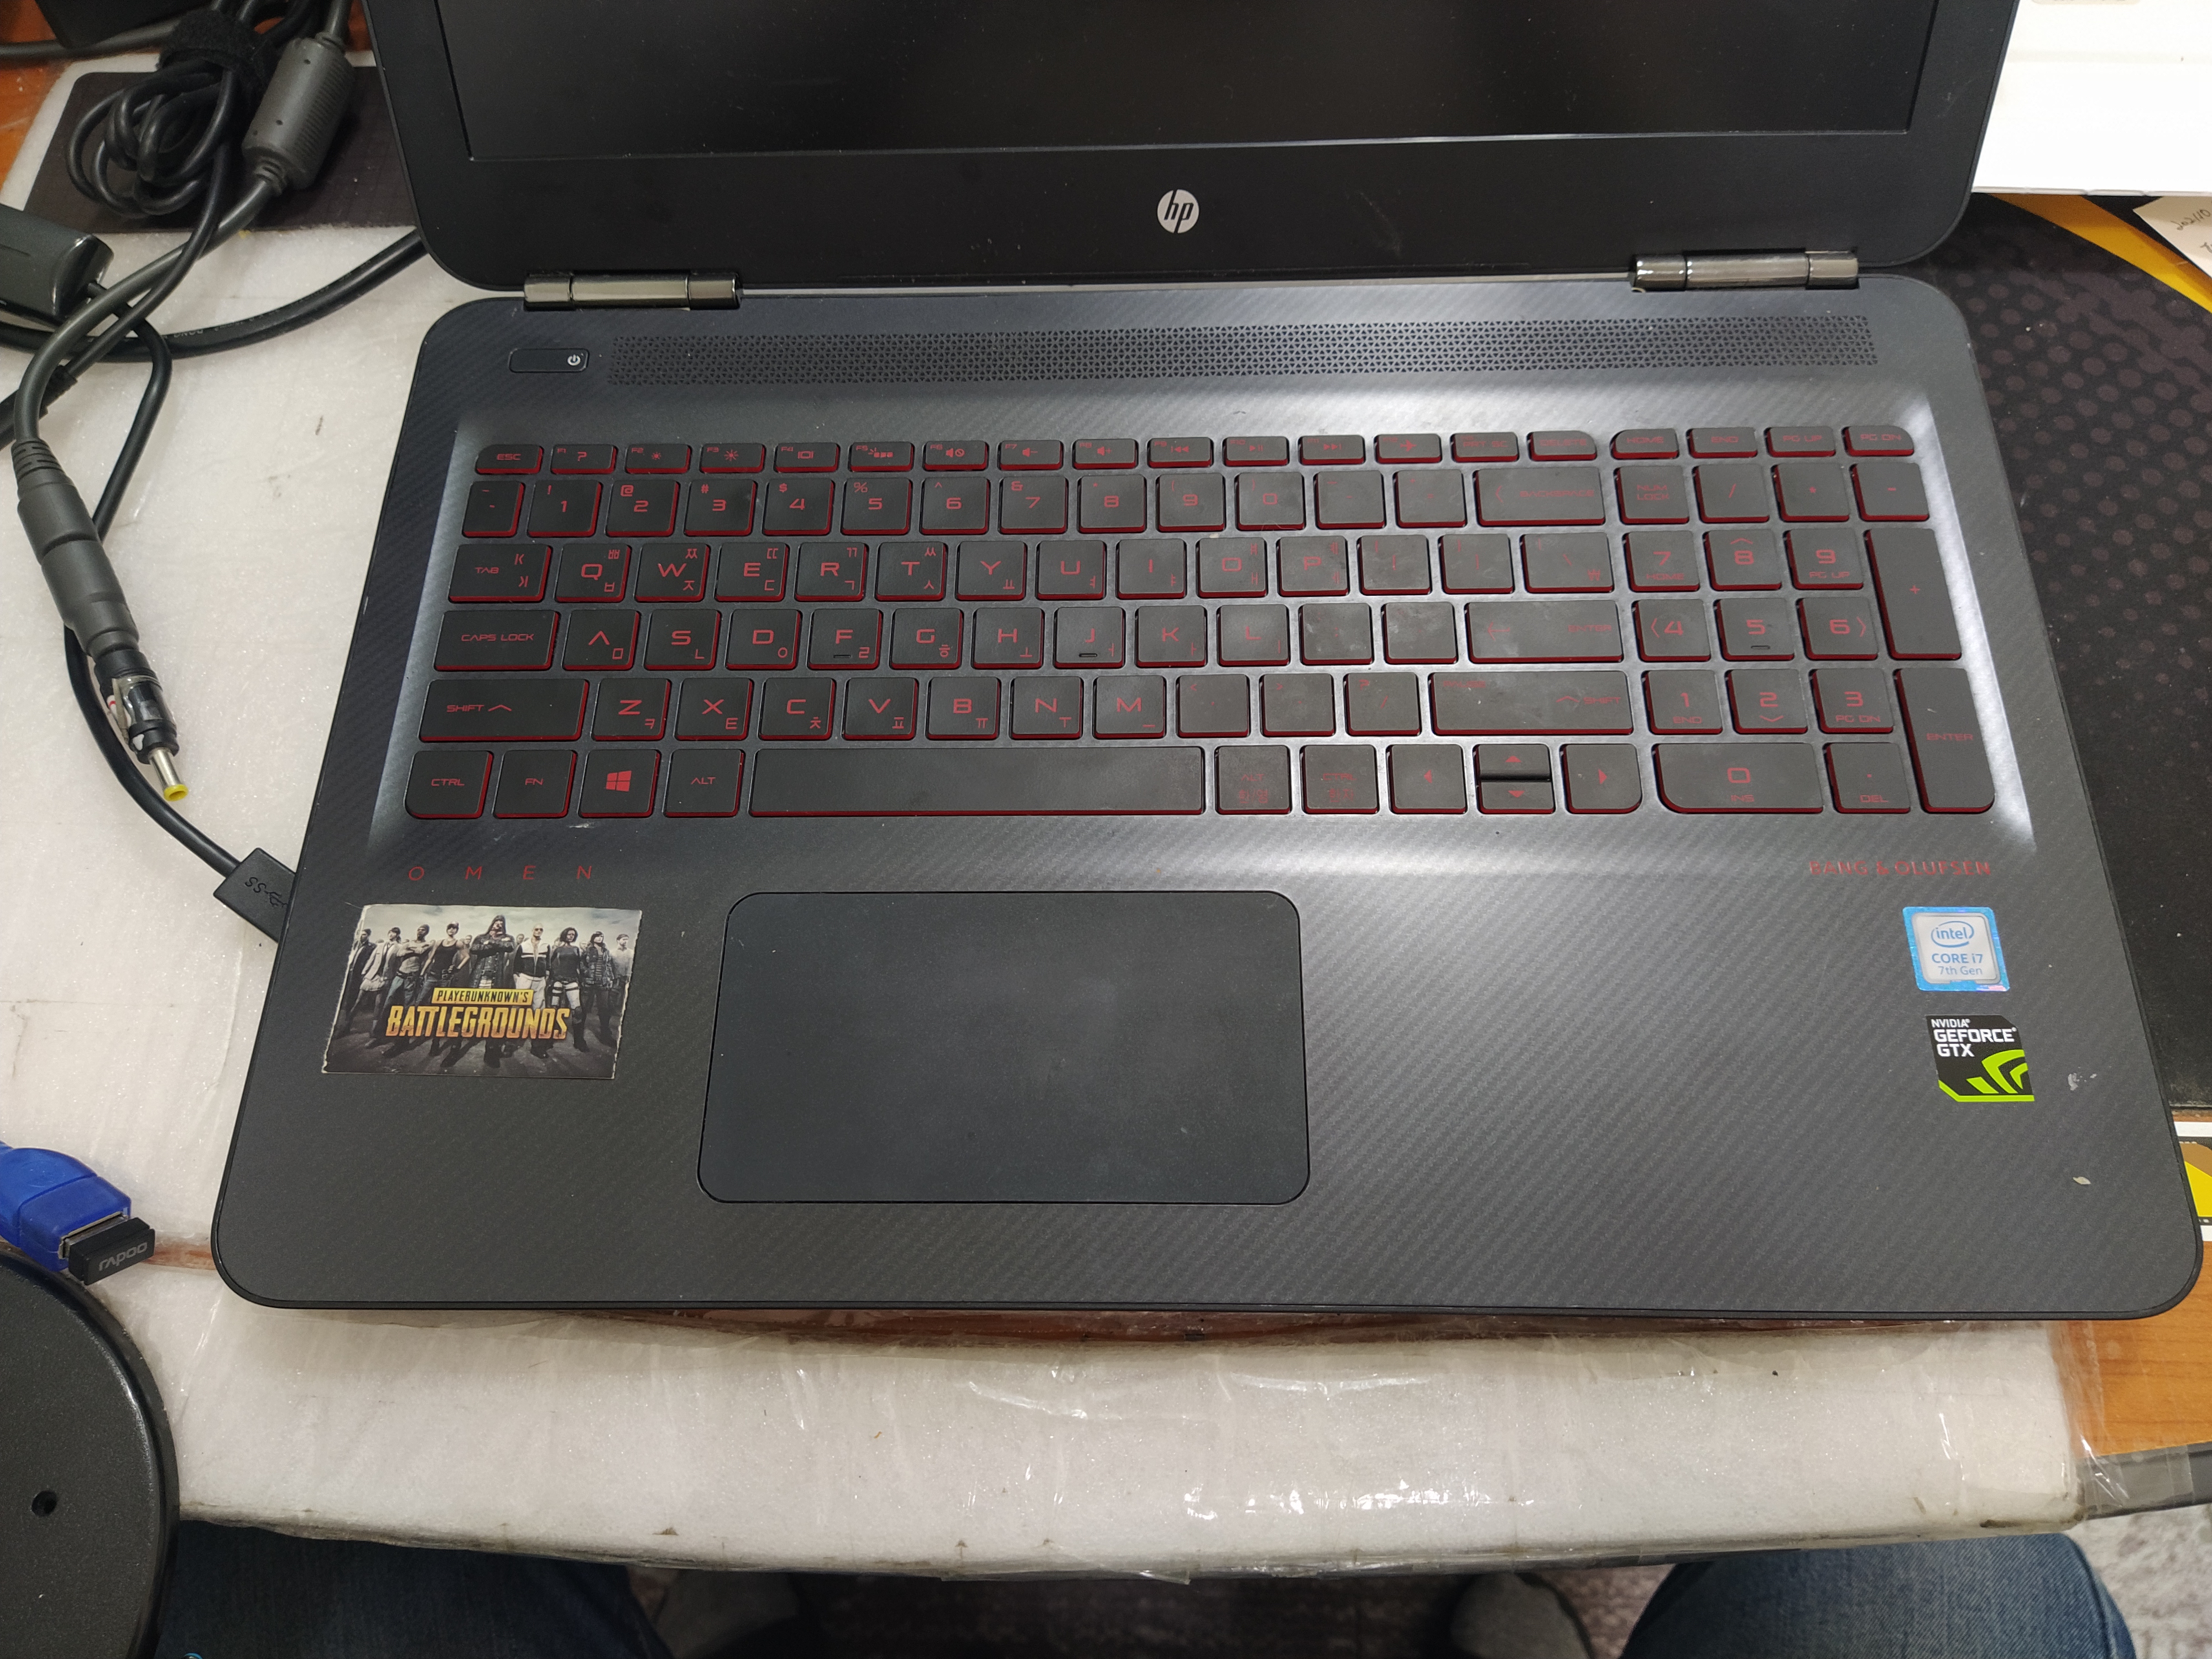
HP 노트북 분해하는 방법 (15-ax231TX disassemble HP laptops) 본문
HP 노트북 분해하는 방법 (15-ax231TX)
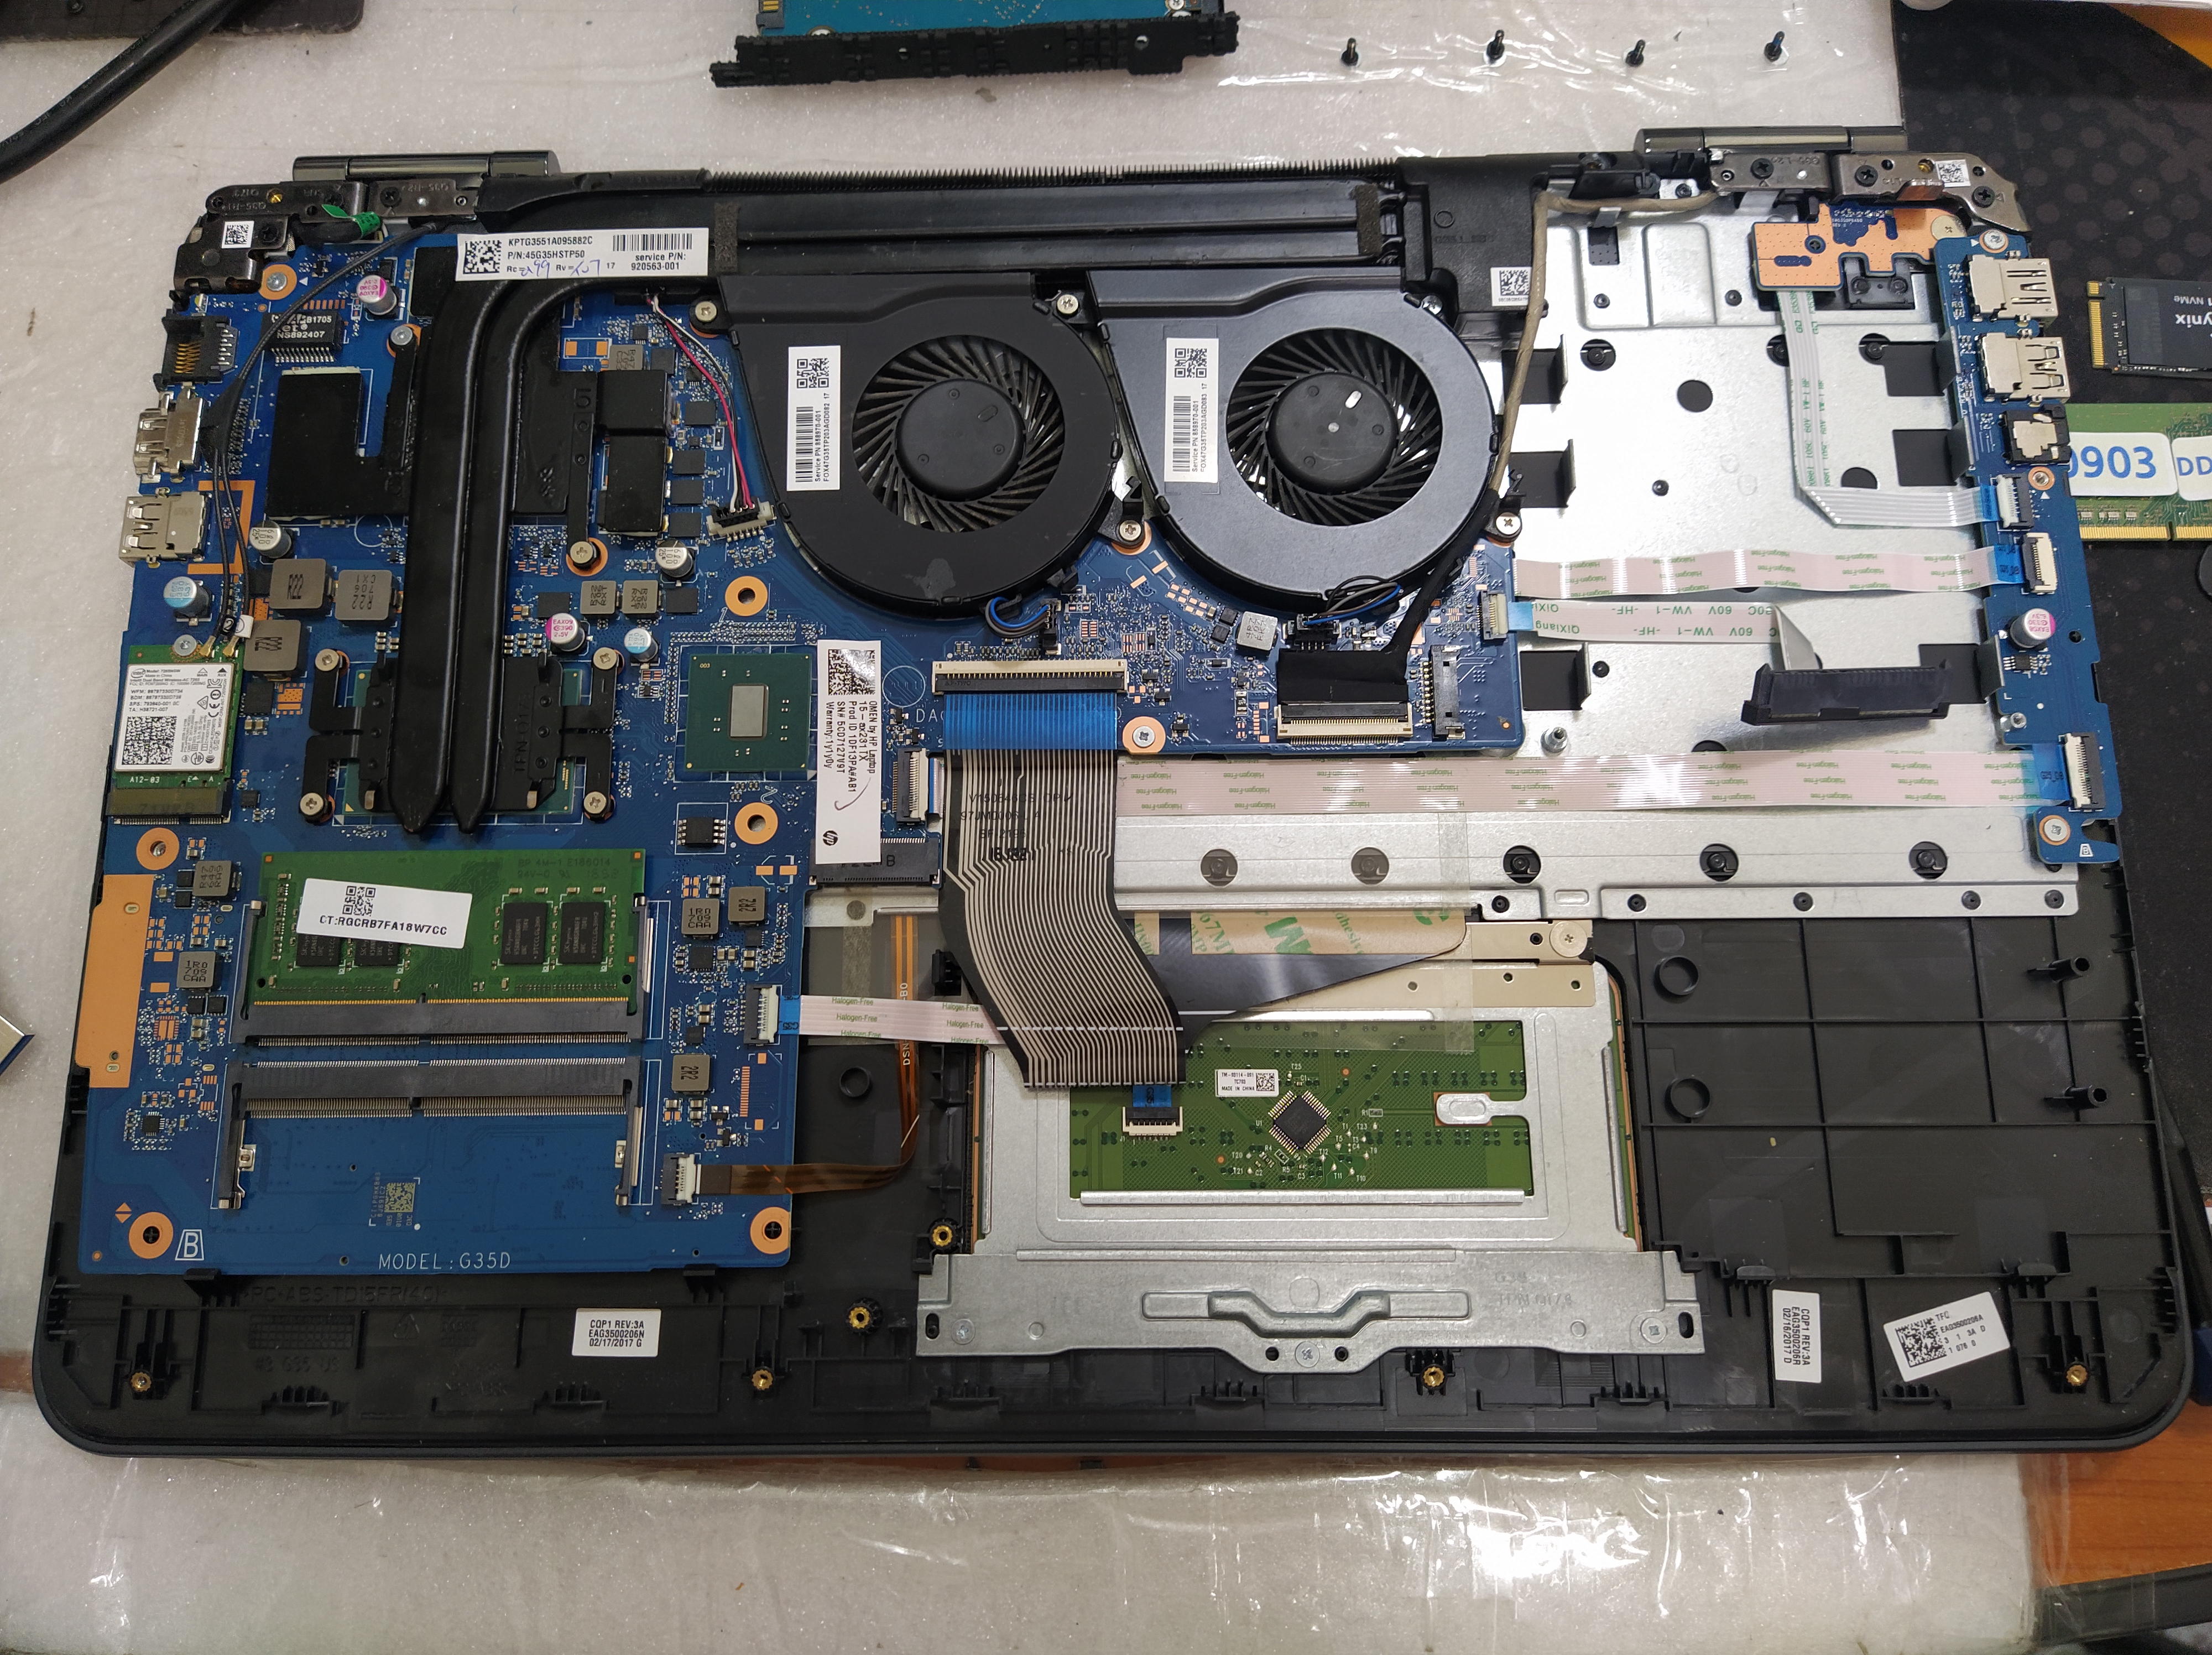
내부에 빗물로 침식된 노트북입니다. 이렇게 불량 난 노트북을 수리하는 건 동네 컴퓨터 수리점에서는 수리하기 어렵습니다. 새 부품/교체 부속이 있는 제조사 AS센터나 용산이나 메인보드 기판 수리하는 리페어 수리점을 찾아보셔야 합니다. 마침, 수리 명장이 근방에서 영업하고 있다면 모를까? 일반적으로 동네에서는 회로 수리가 가능한 컴퓨터 수리점을 찾아보기가 쉽지 않습니다. 대부분의 컴퓨터 매장은 아세이(부품, 파트별) 교체로 수리할 수밖에 없습니다.
혹시라도 개인적으로 수리를 받아보실 계획이라면, 유튜브에서 노트북 수리 등으로 한 번 찾아서 동영상을 보시고 근방의 믿을 수 있는 리페어 샵을 찾아보실 거 같습니다. 노트북에 물이 들어가서 부식되면 여러 군데서 문제가 발생해서 수리가 쉬워 보이진 않습니다. 노트북에 있는 데이터만 살리기 위해서 내방해주셨는데요. 하드디스크 또는 SSD가 고장 나지만 않았다면, 분해해서 다른 컴퓨터에 연결하면, 데이터를 살려볼 수는 있습니다. 하드디스크나 SSD 마저도 침수돼서 전기가 통해서 저장장치의 회로판(기판)이 손상됐다면, 데이터 복구 전문 업체를 찾아보셔야 합니다.
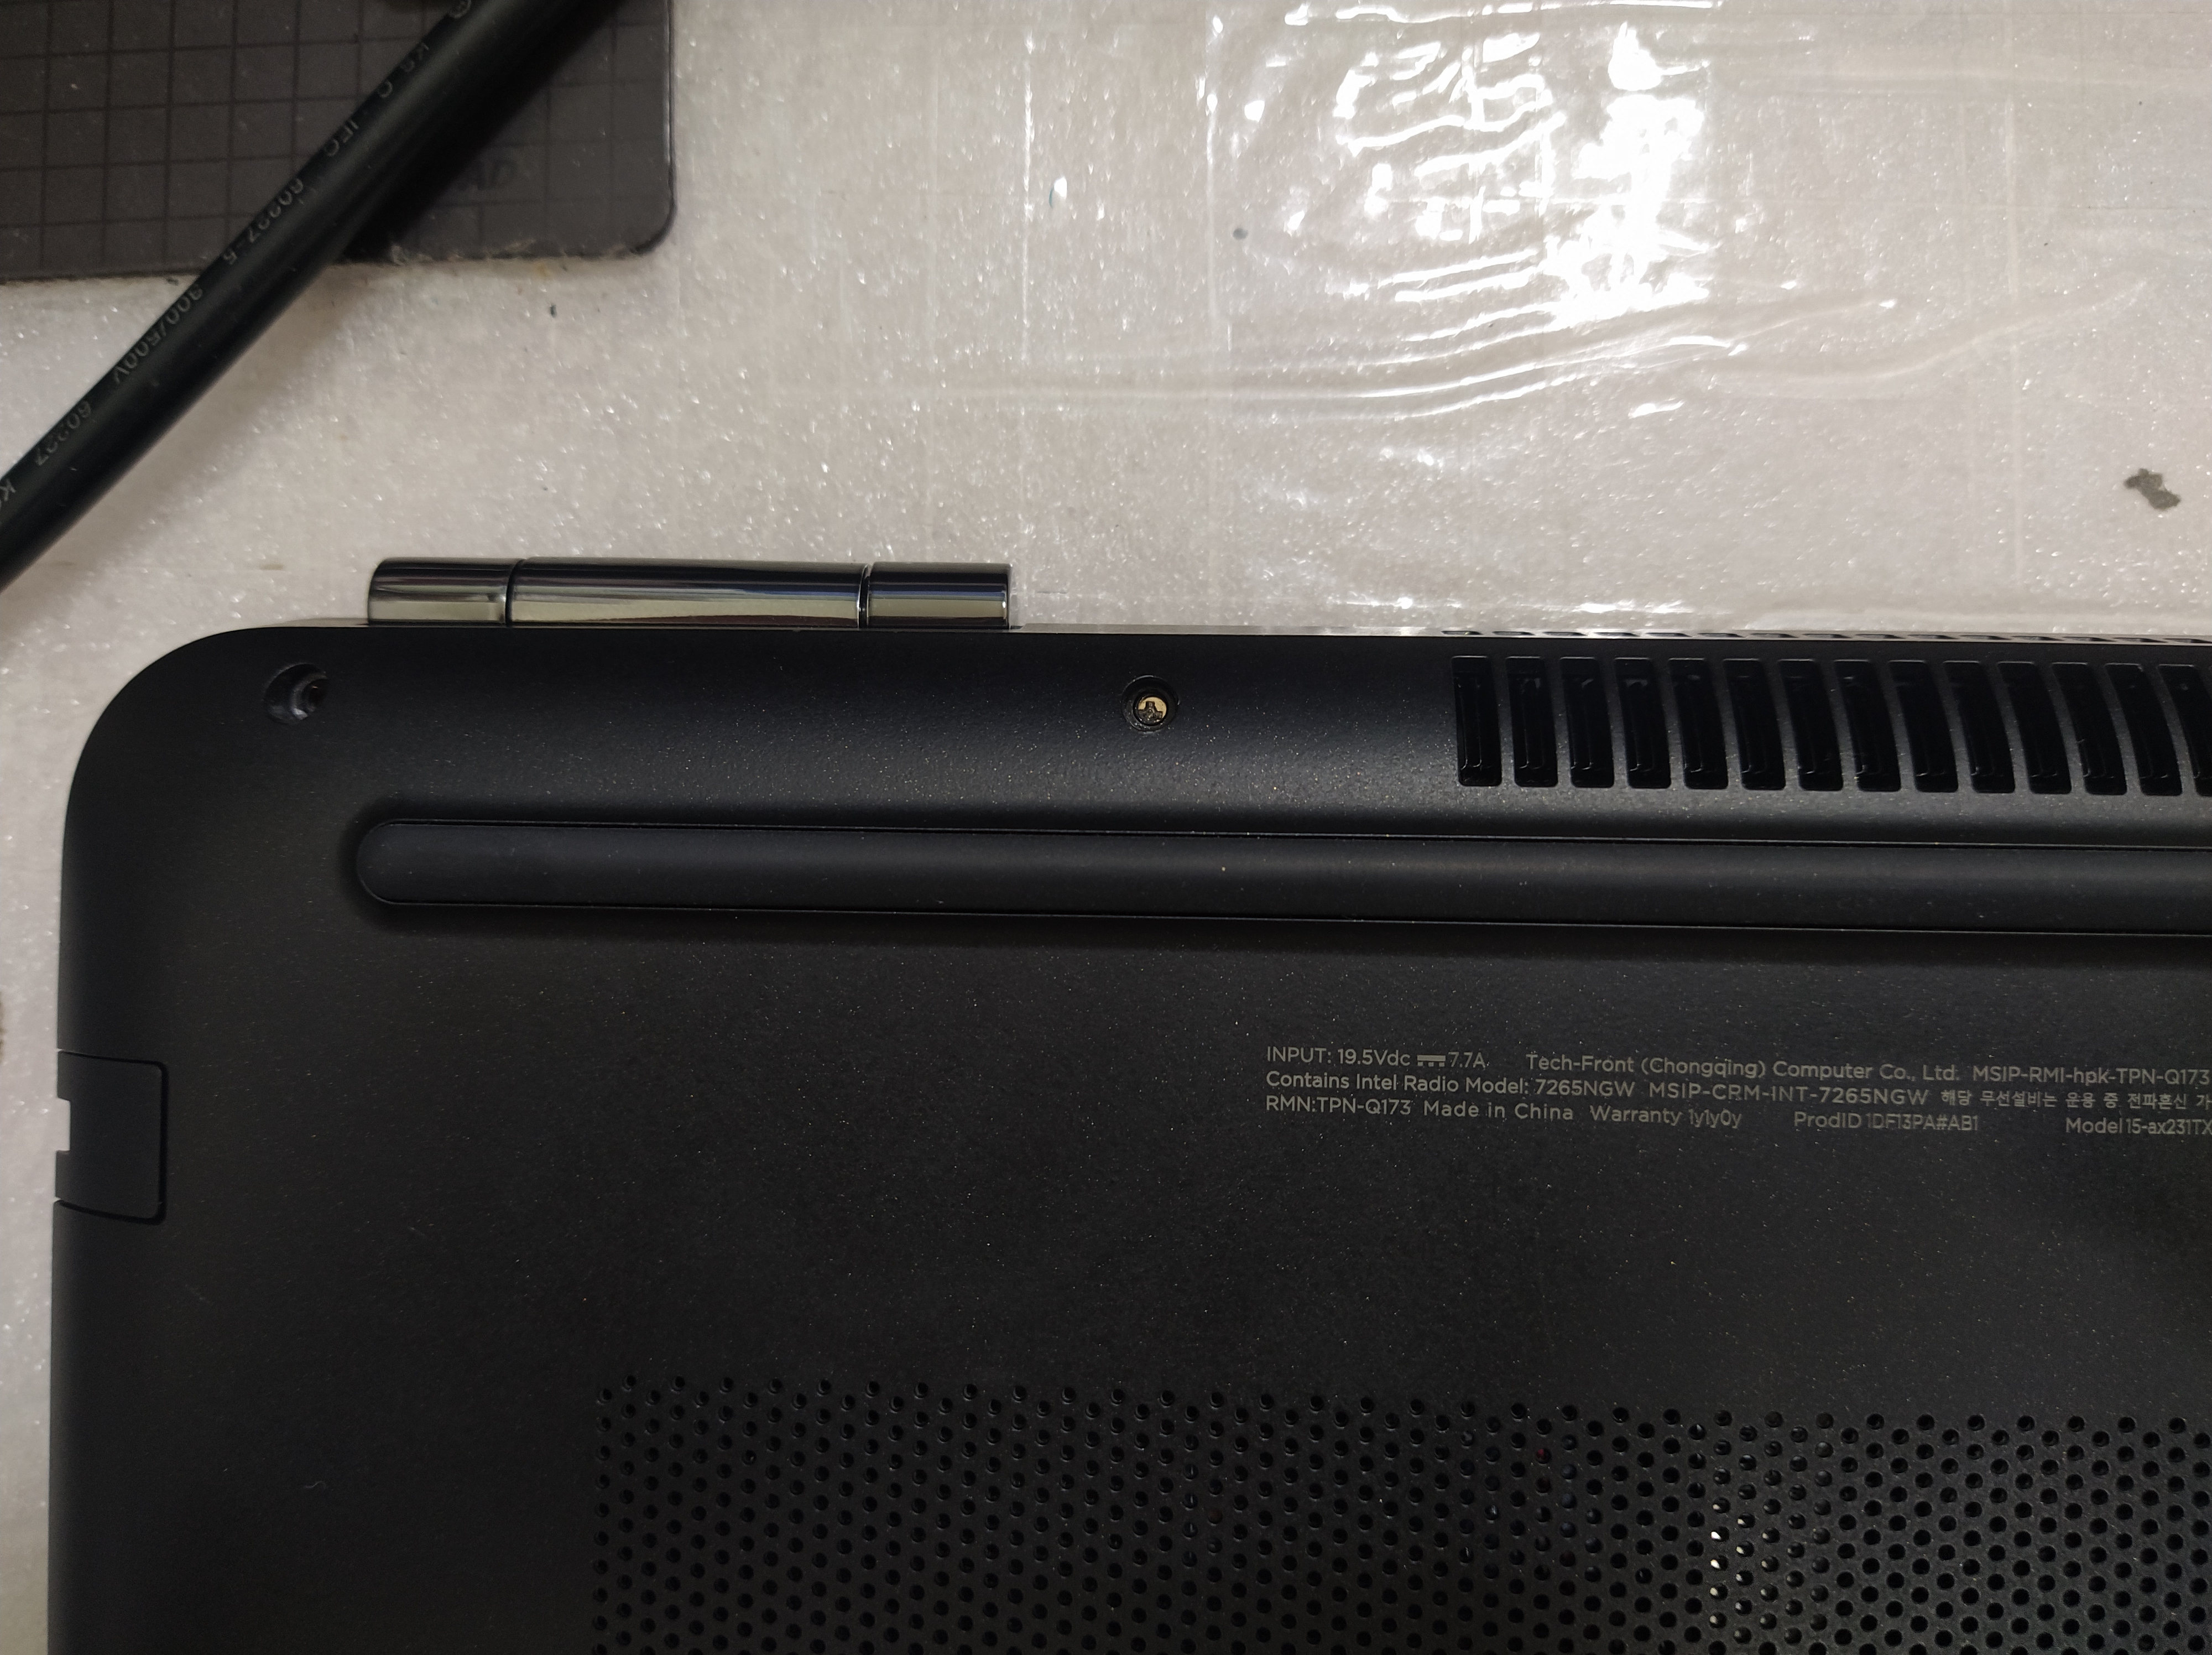
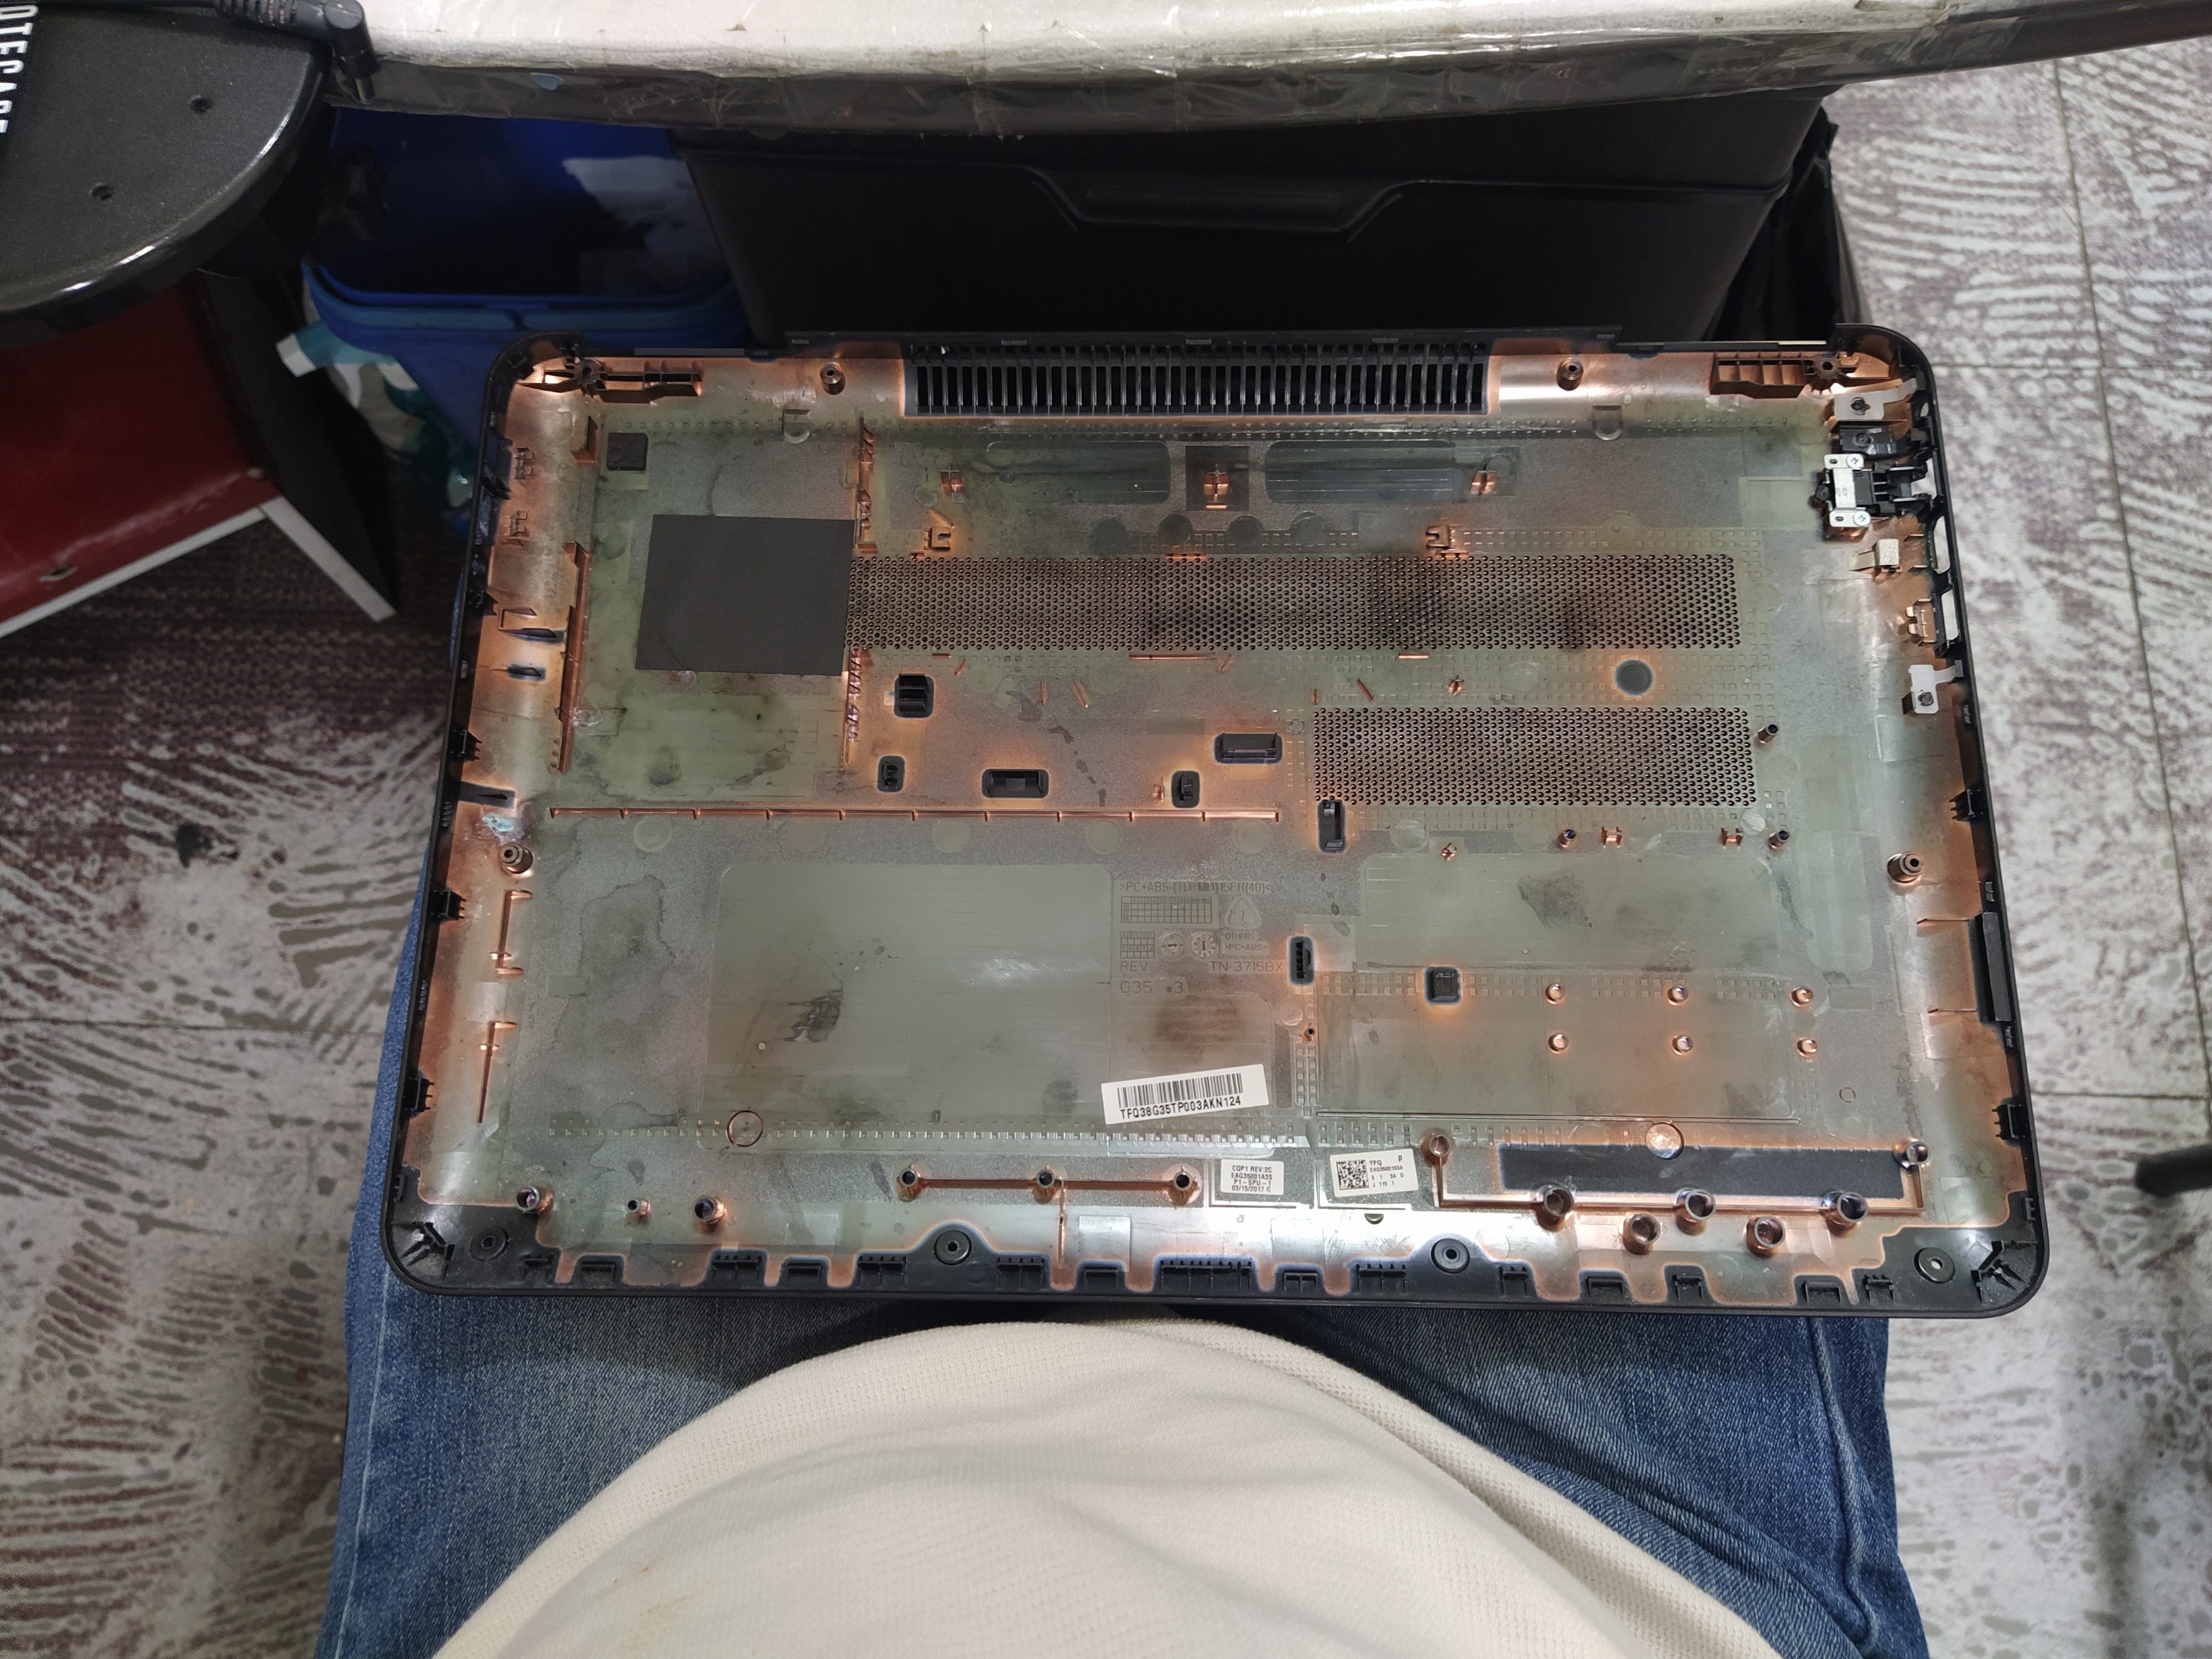
다른 수리점에서 한 번 수리를 받으셨는데요. 나사의 위치가 제대로 체결이 안 된 거 같습니다. 나사가 원래 위치가 아닌 곳에 장착되고 몇 개는 없고 그렇습니다.
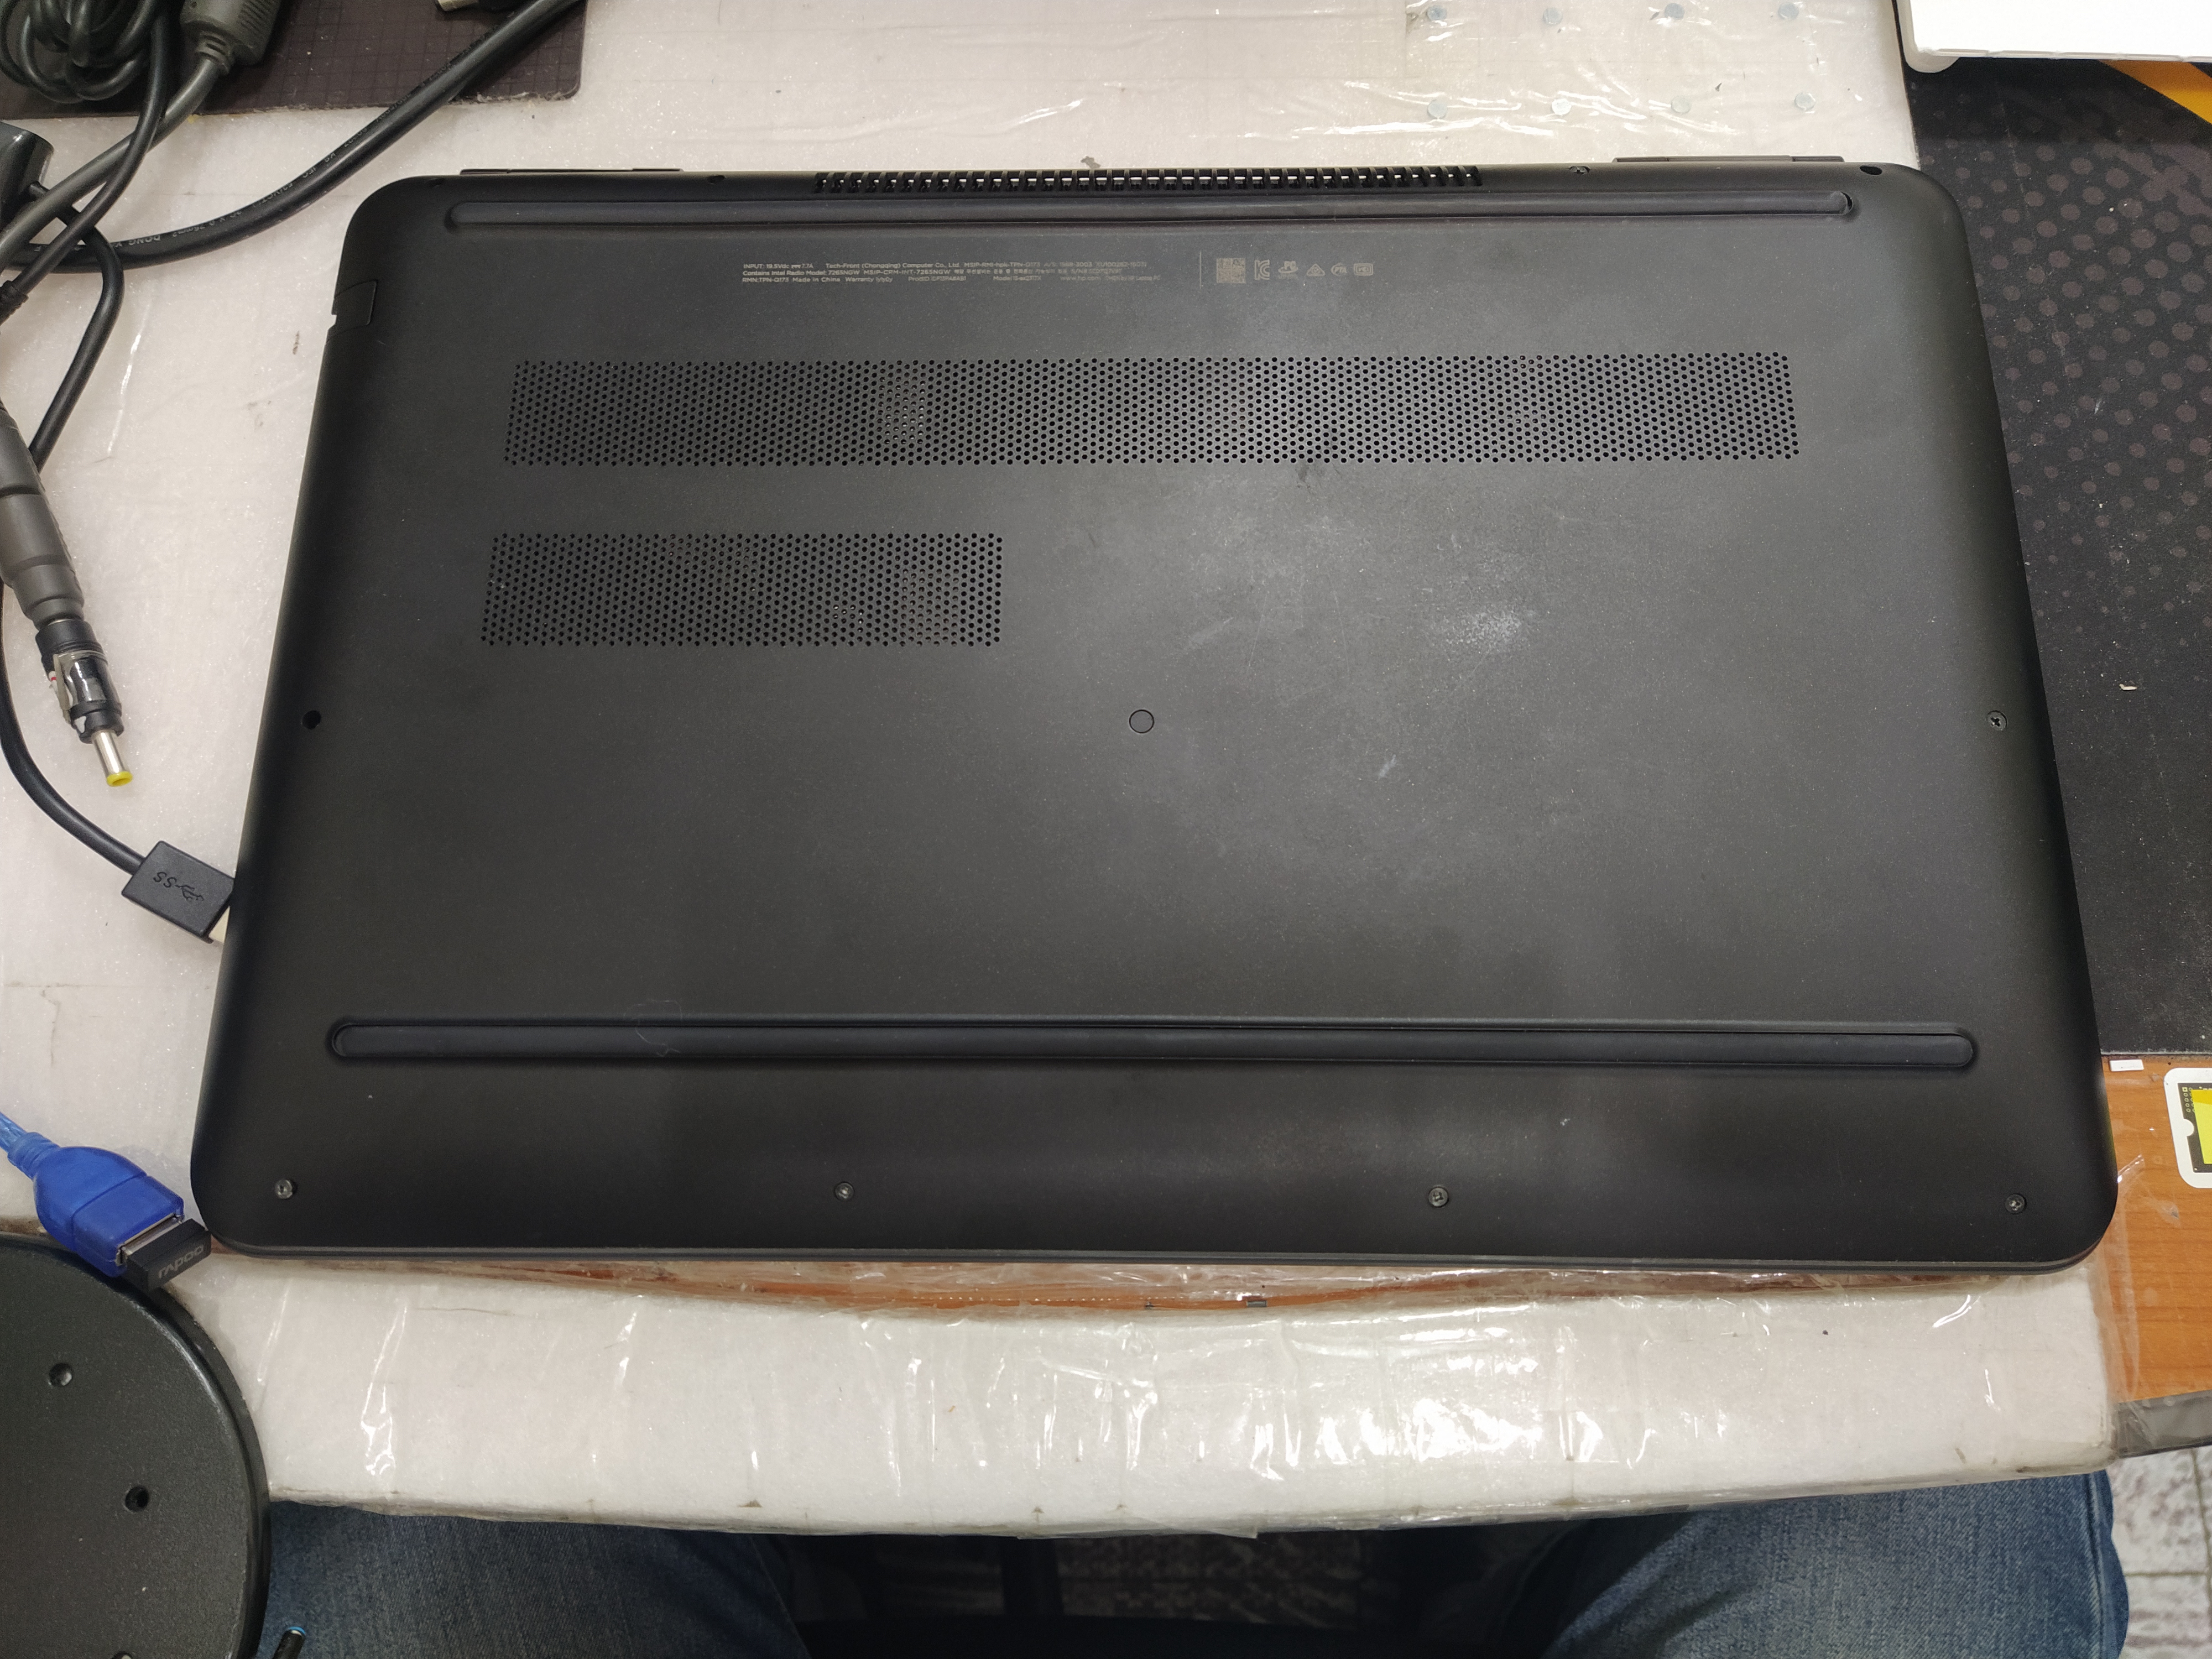
하판 플레이트를 고정할 나사 구멍인데 노트북 메인보드에서 나사를 박아놓은 상태입니다.
아래도 마찬가지로 나사가 조여져야 할 구멍에 나사가 이미 조여진 상태라서 외부 나사가 조여지질 않았고 자기 짝도 아니라 조여지지도 않네요.
반대편은 조여진 나사가 없습니다.
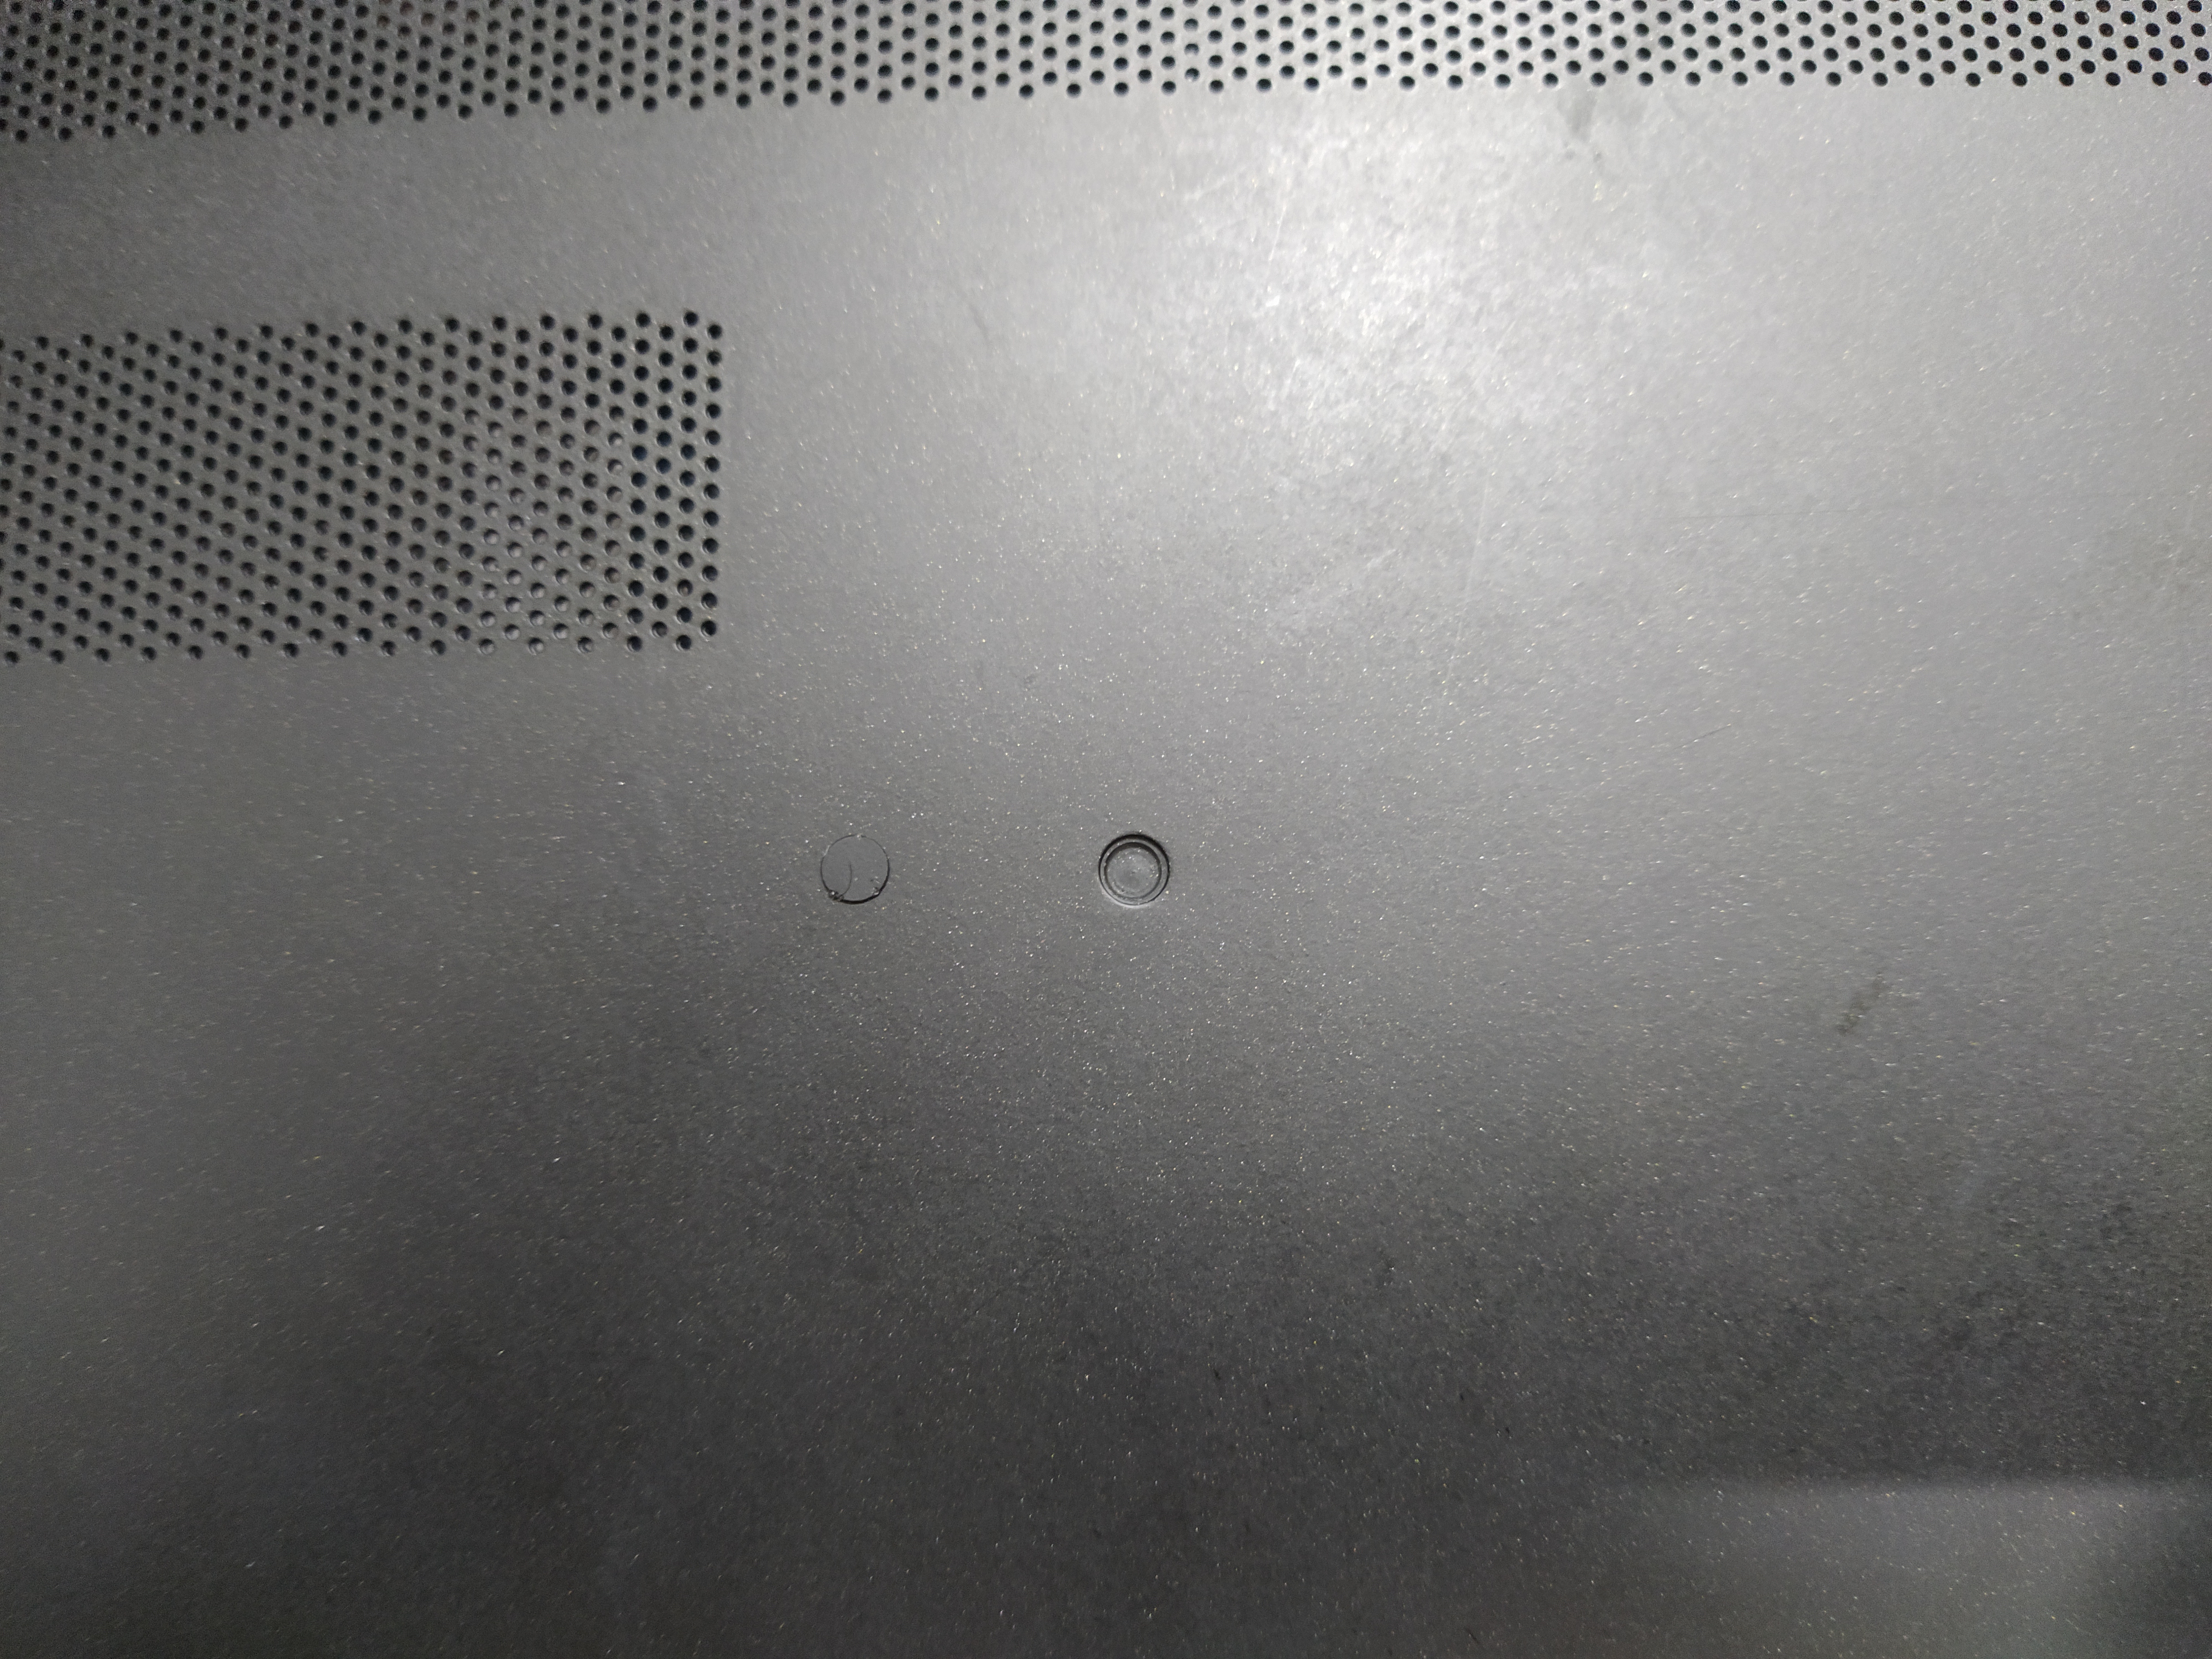
노트북 가운데 가려진 나사가 있는지 찾아보고 있습니다.
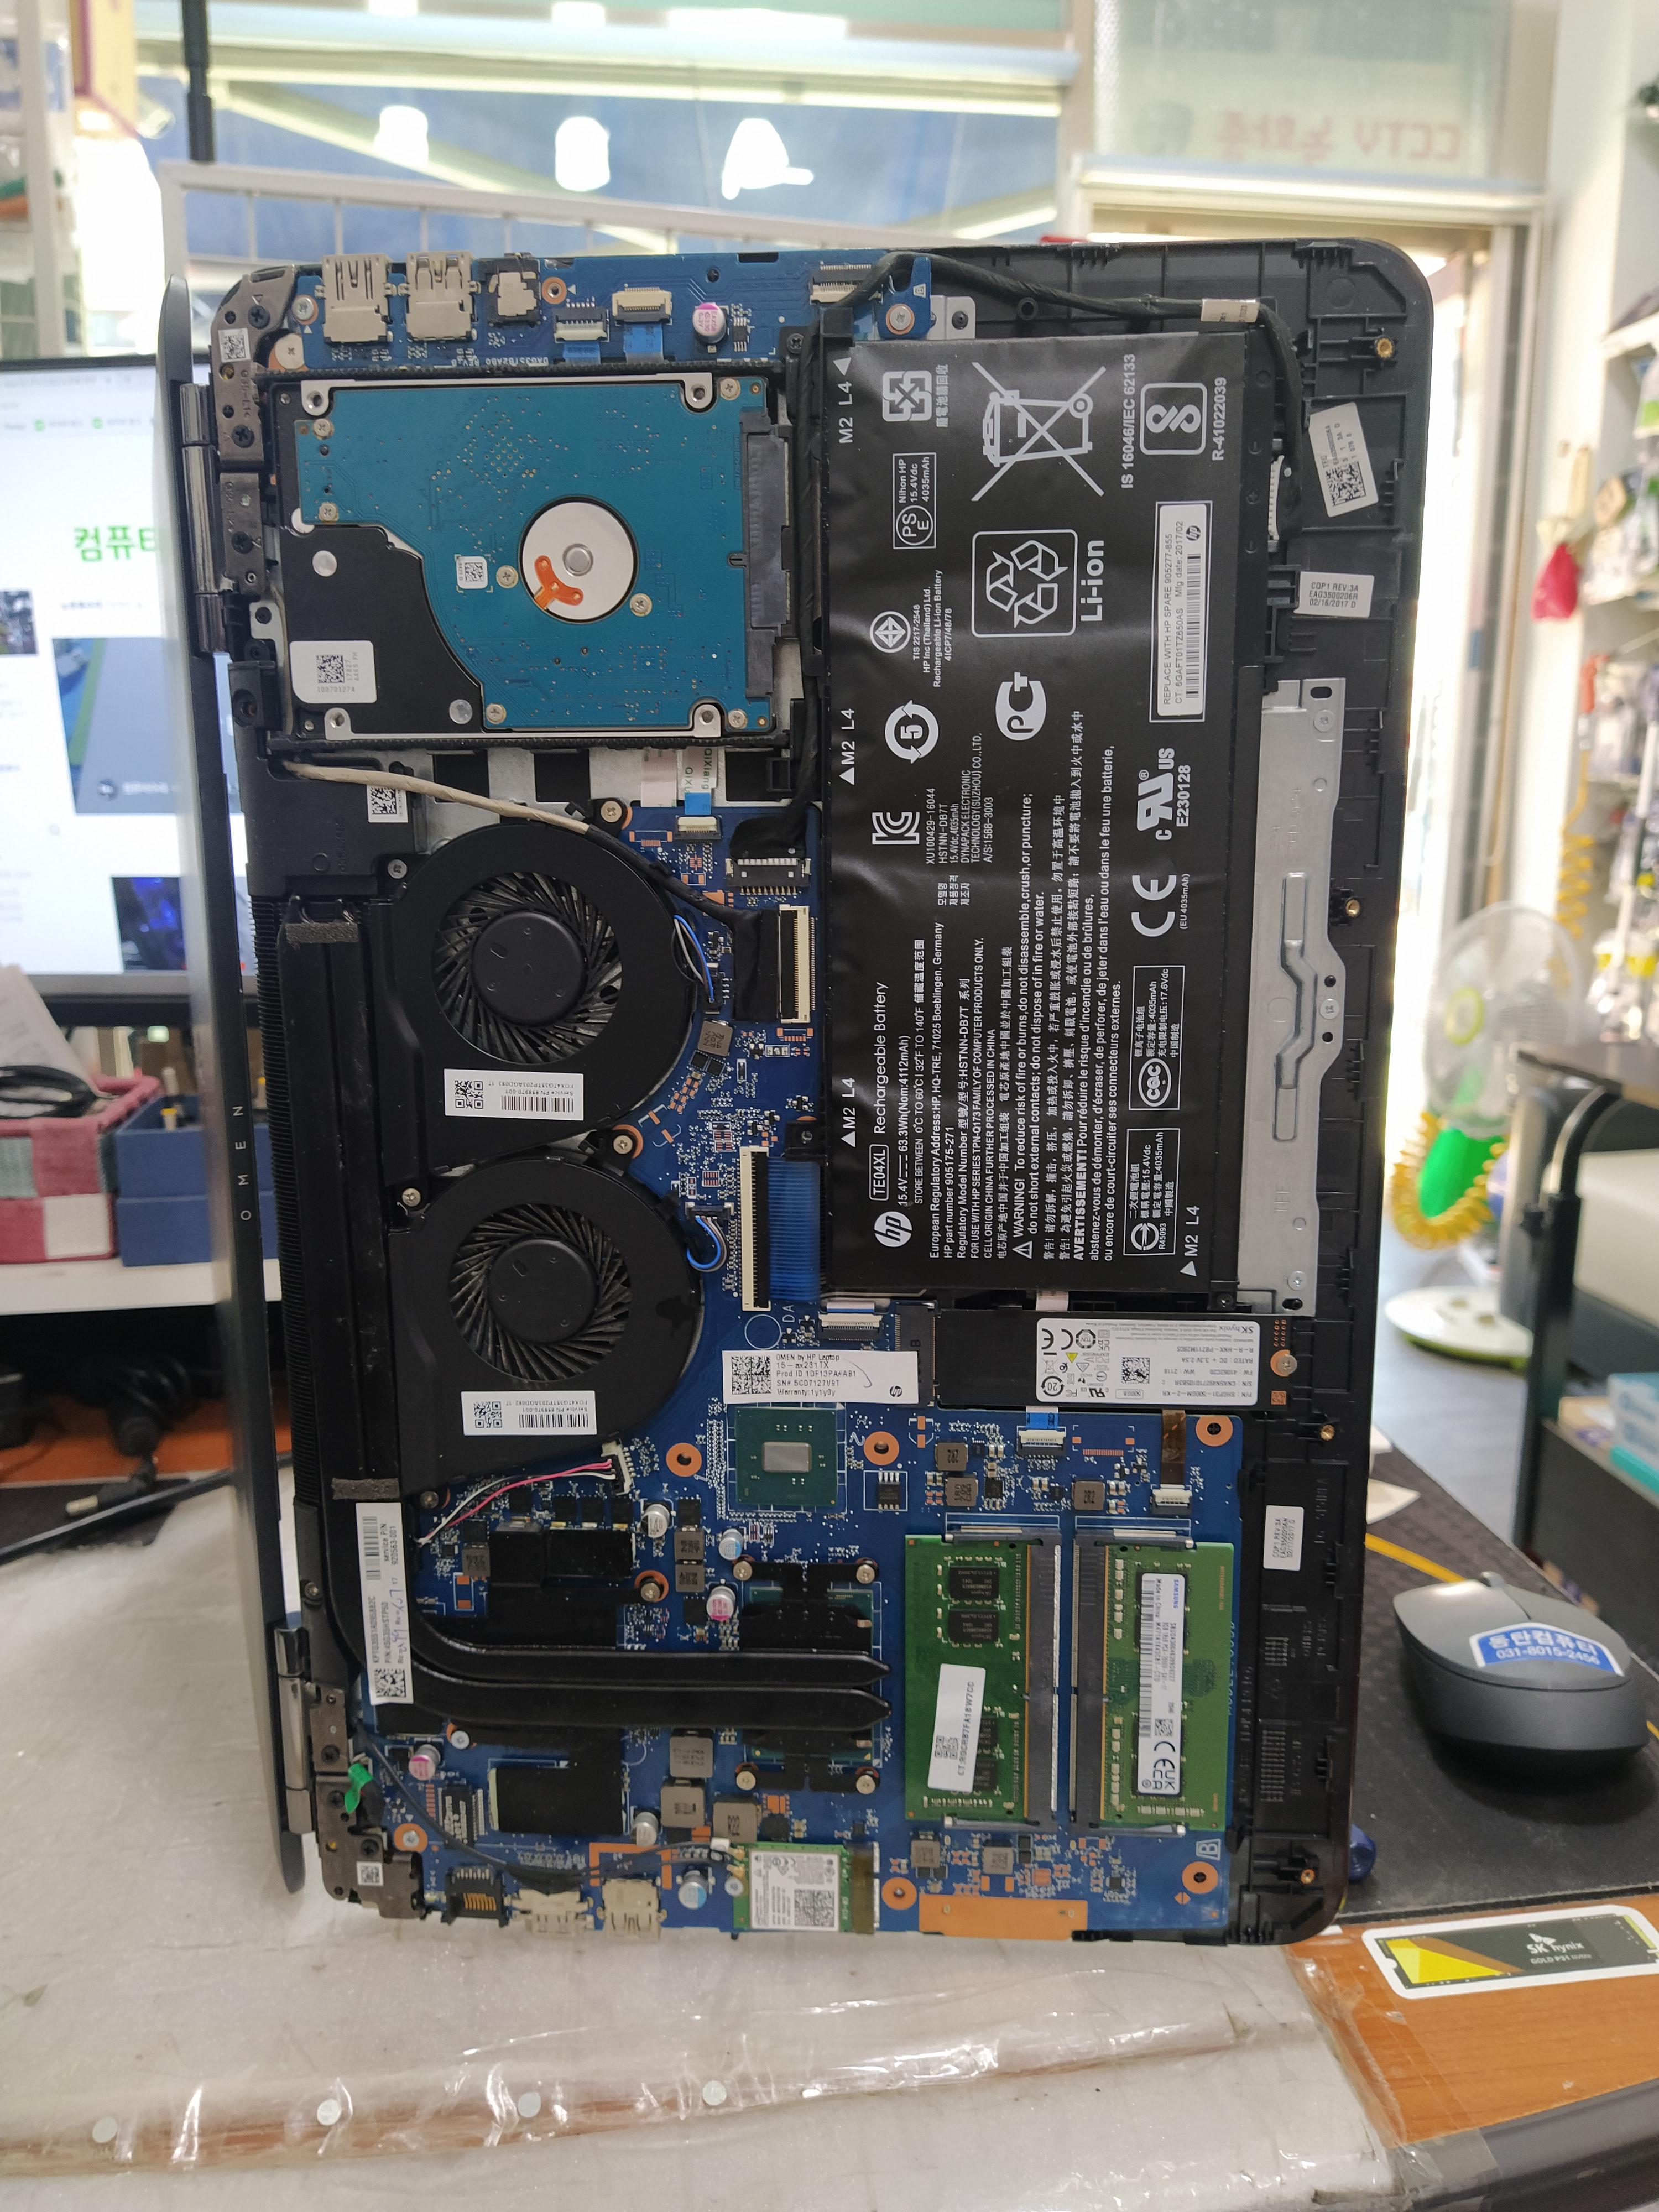
노트북을 개봉하니깐 아래와 같이 물이 흐른 자국과 금속이 산화된 흔적(청록색 물질)이 보이네요.

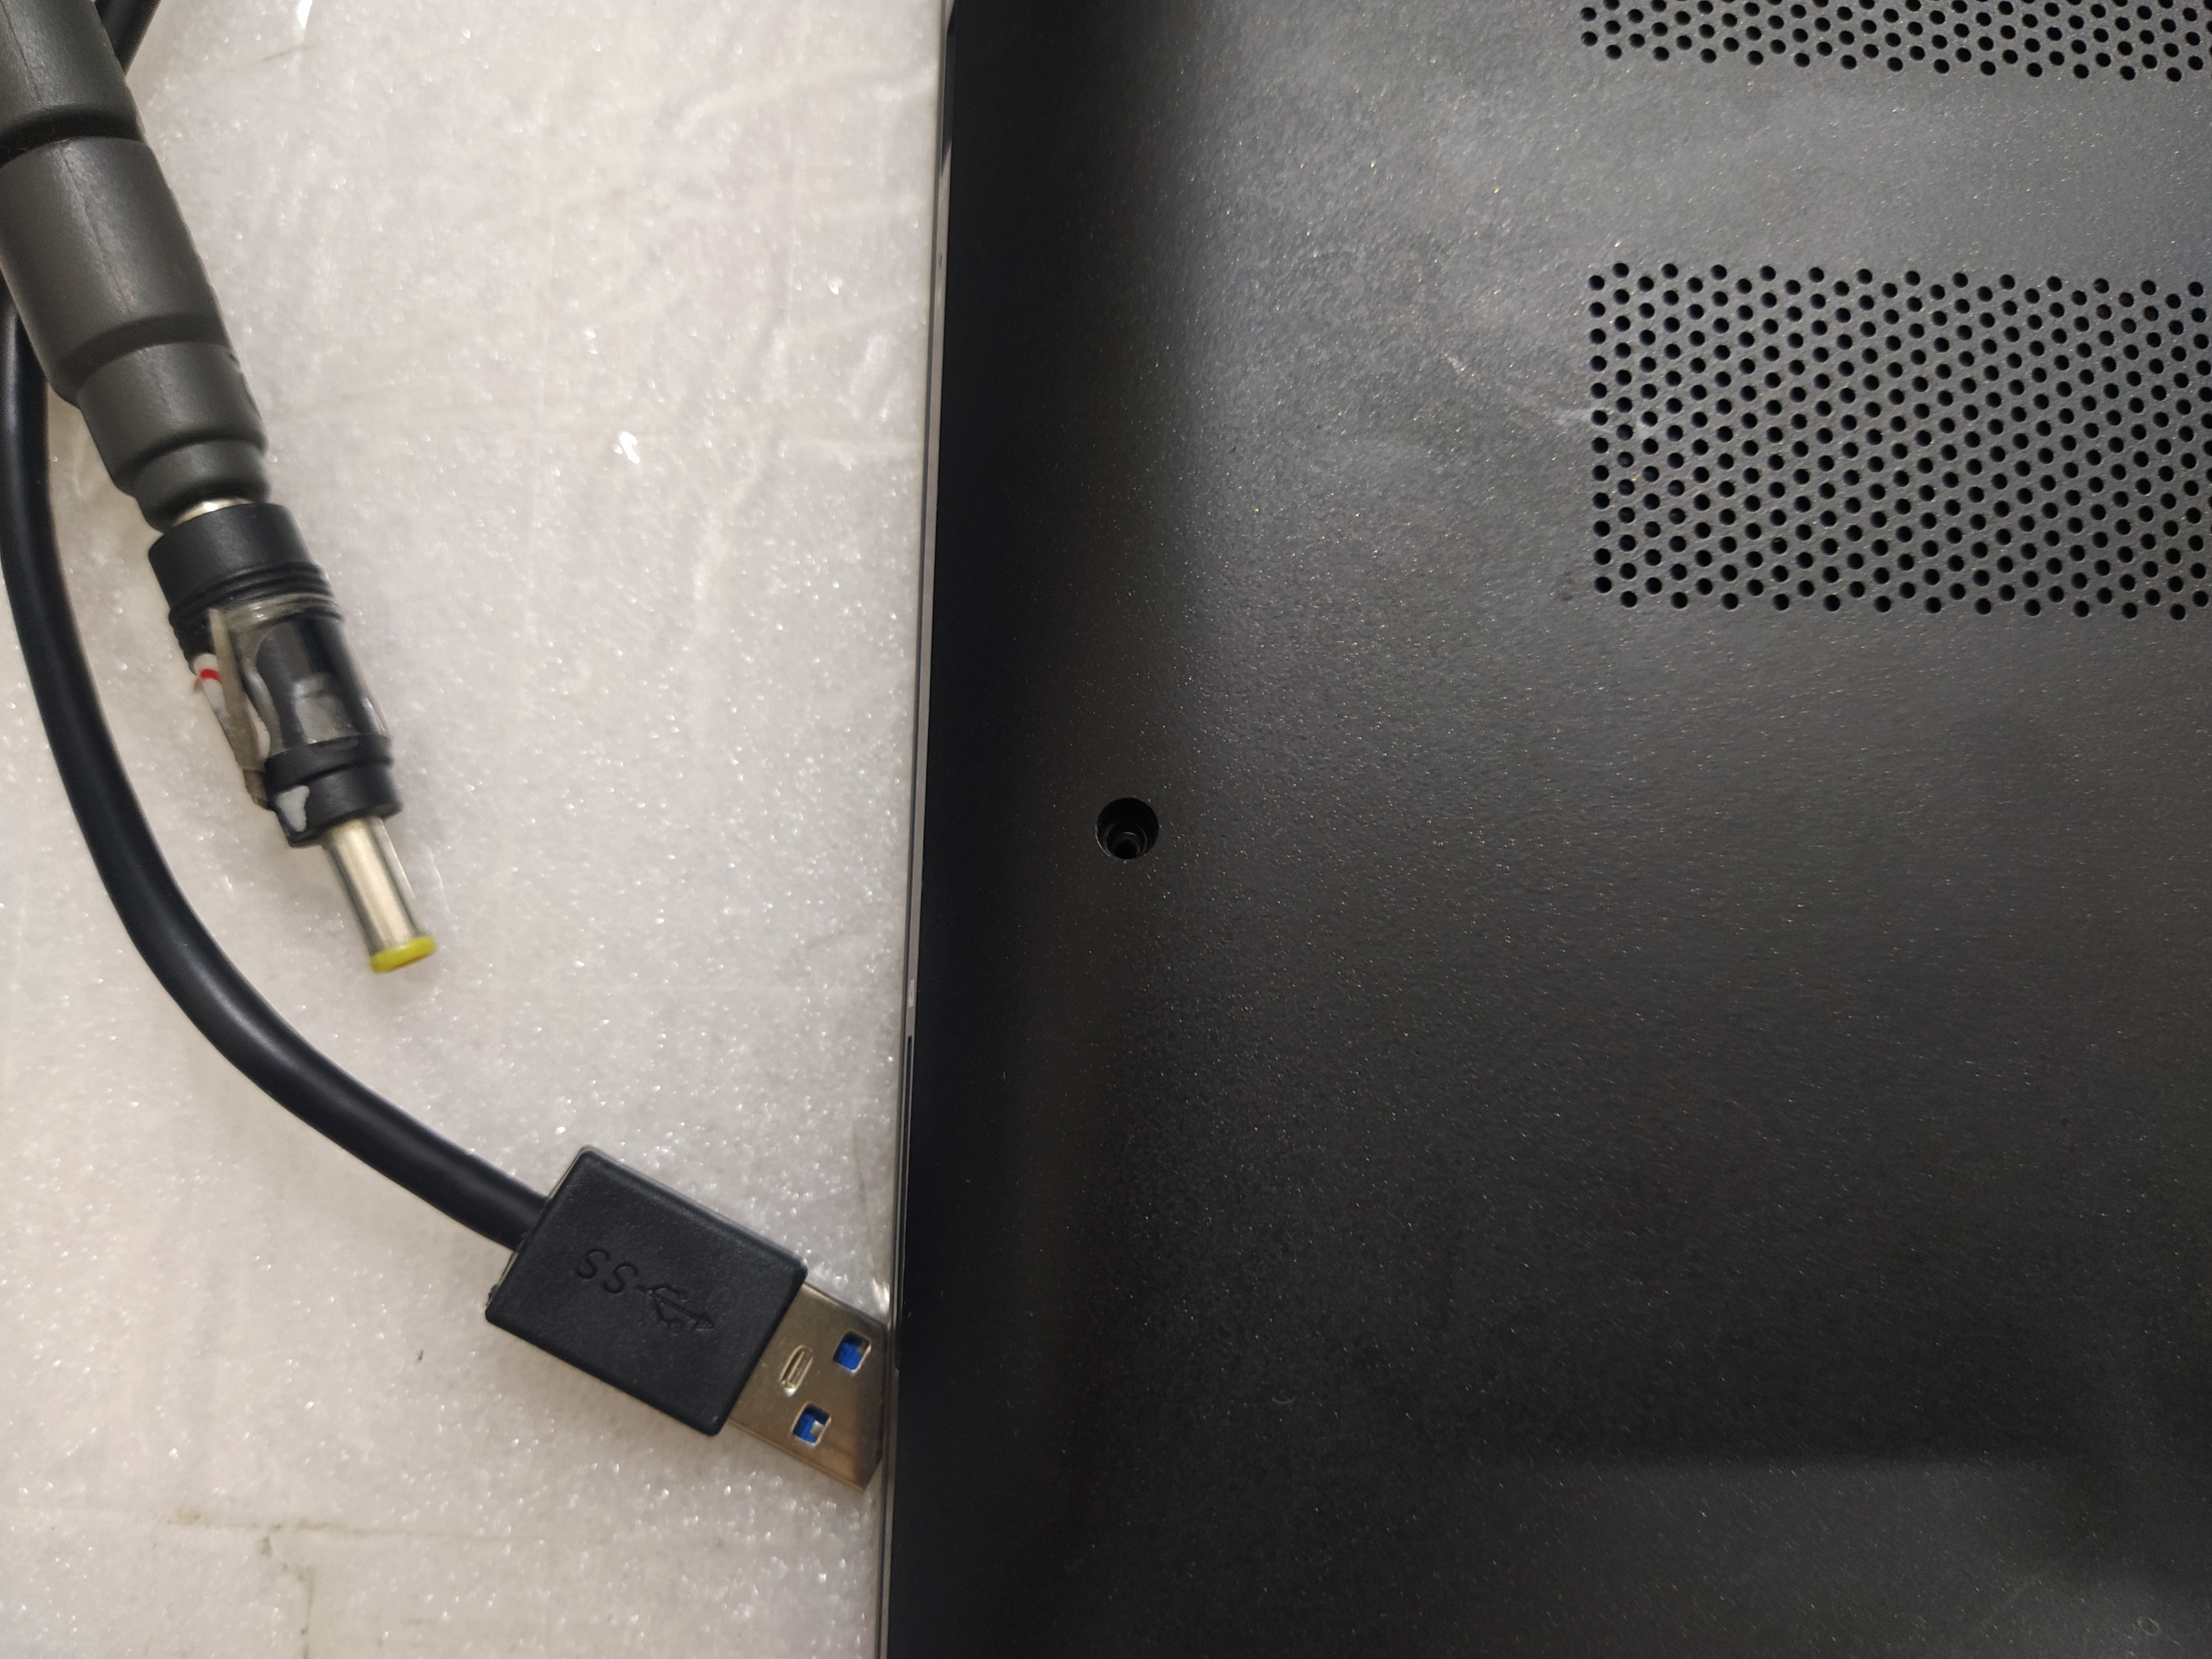
좌측 편 USB 포트 등과 연결되는 기판 케이블이 유관상으로 봐도 삭은 게 보입니다.
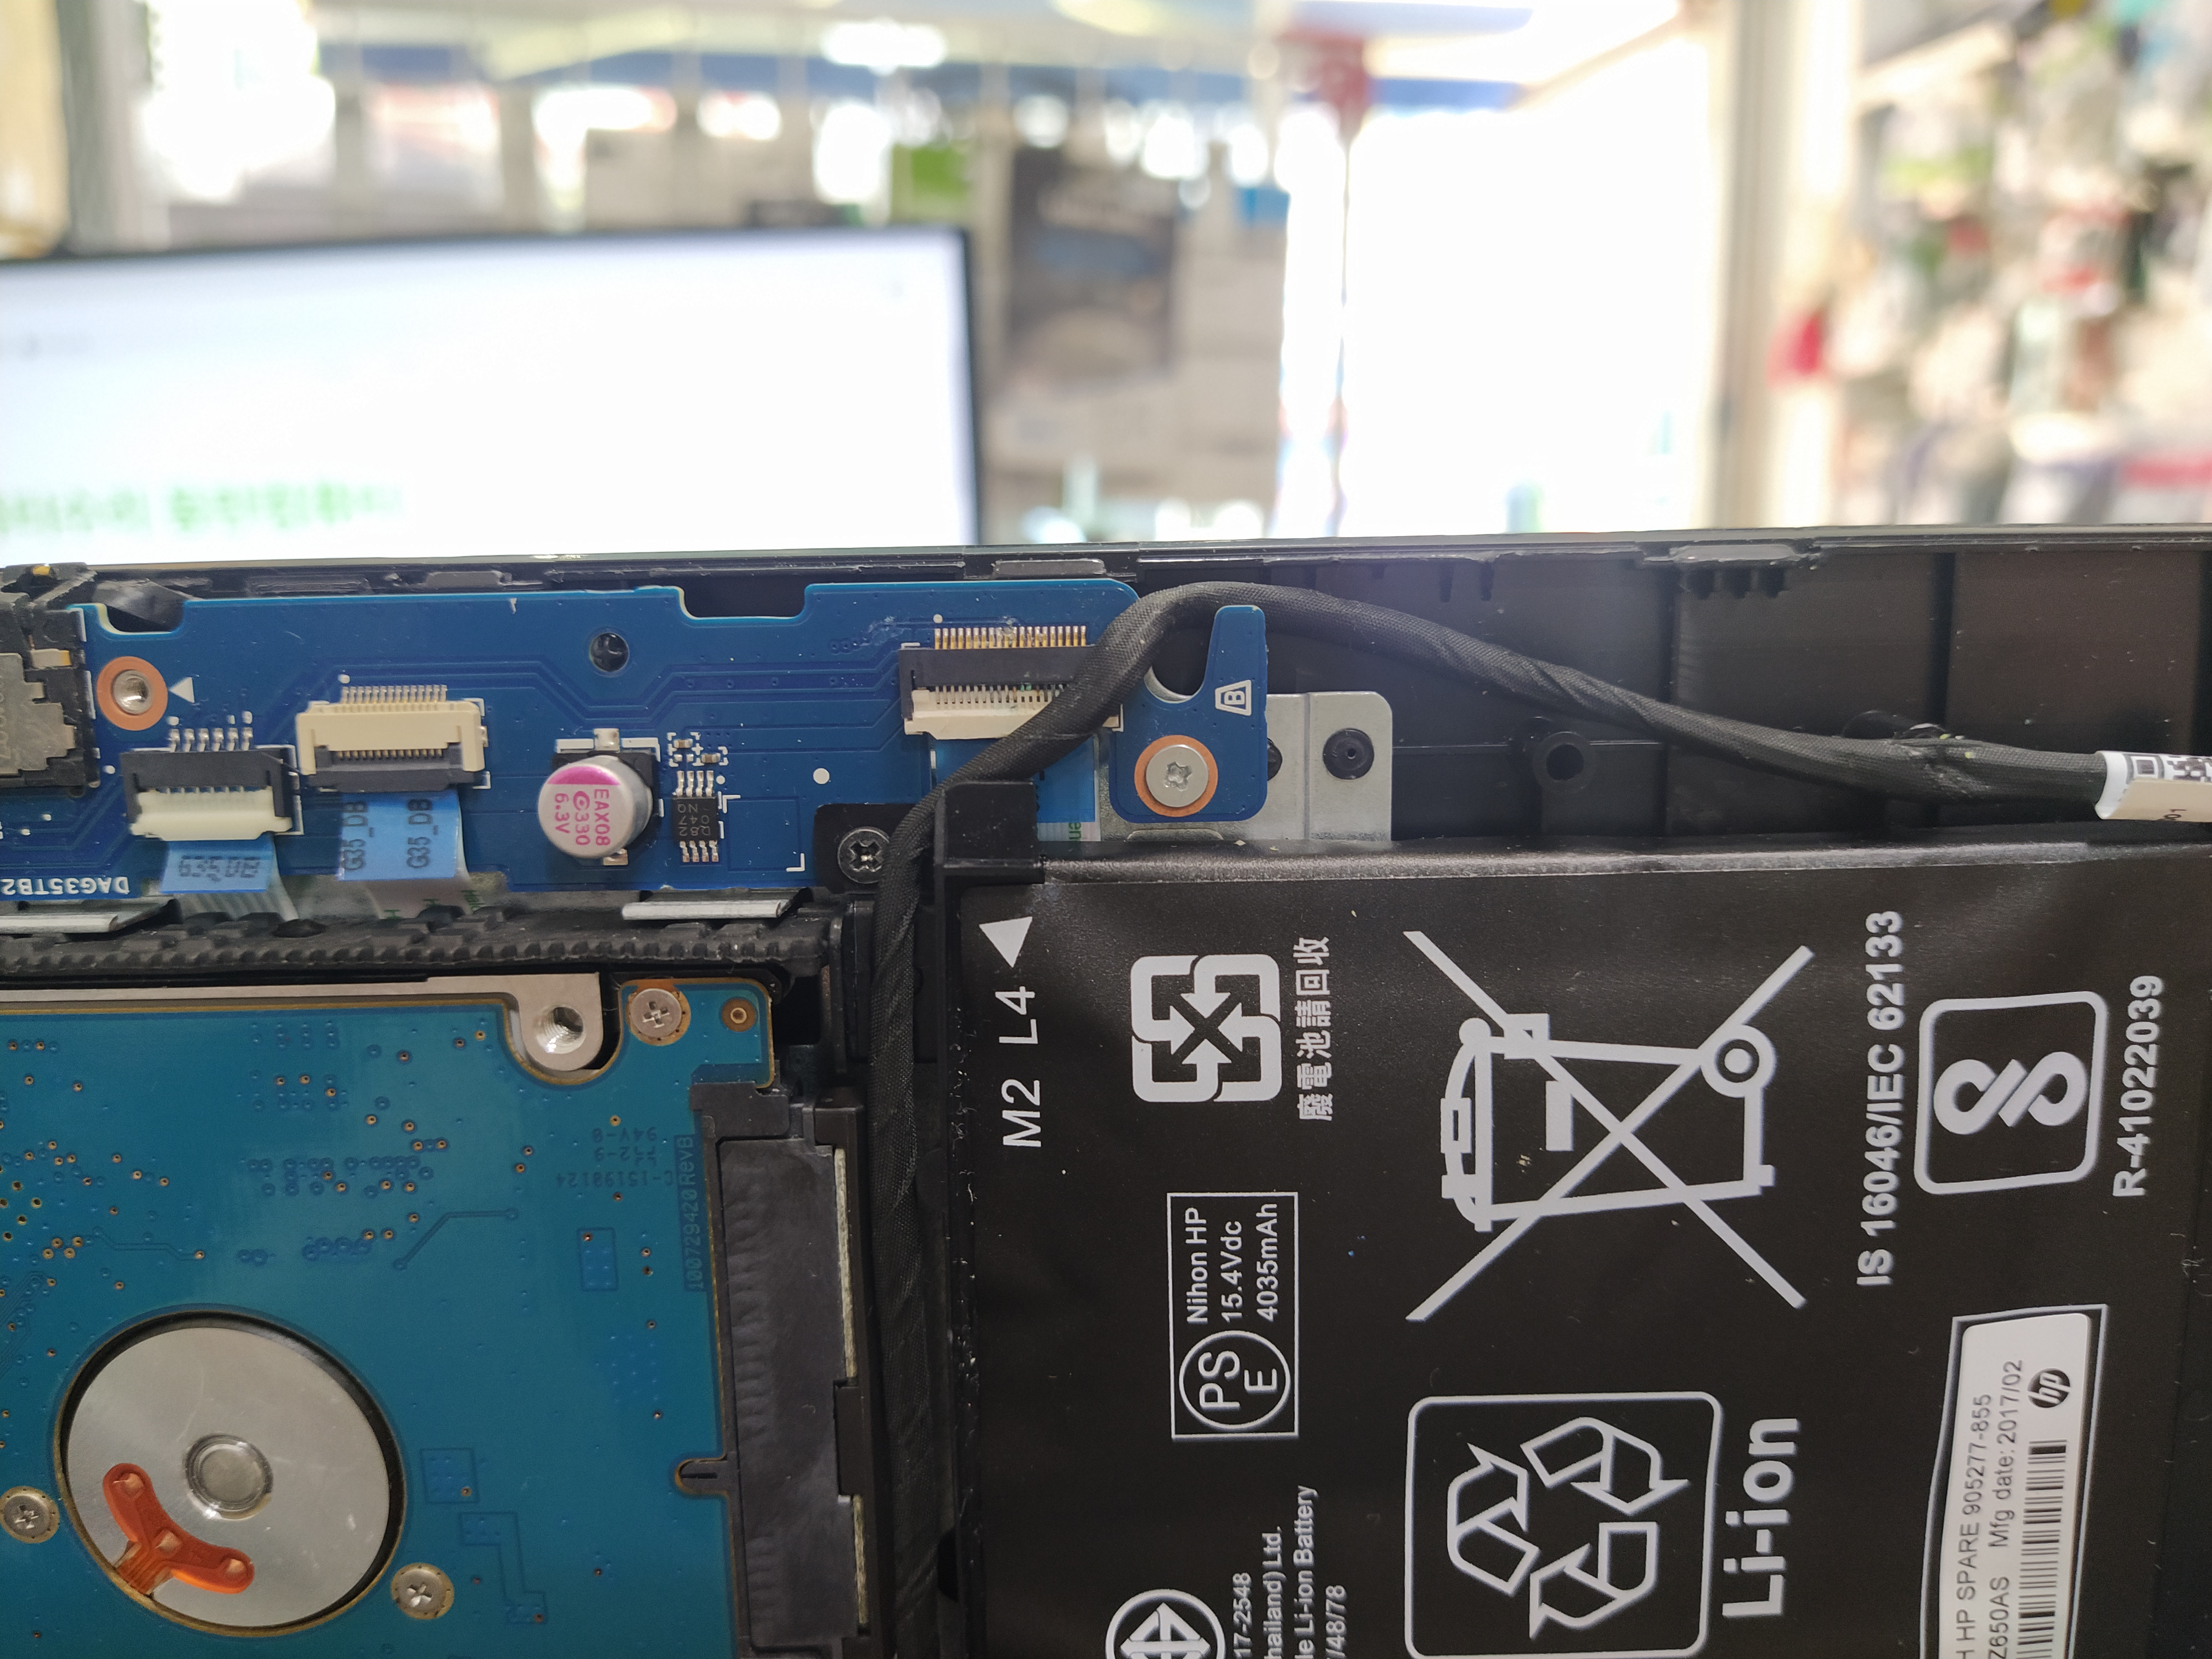
노트북의 배터리는 스웰링 현상으로 부풀어 오른 상태입니다.
뒤판 플레이트의 나사가 잠기지 않은 것은 아래와 같이 메인보드에 이미 나사를 체결해 놓았기 때문이고
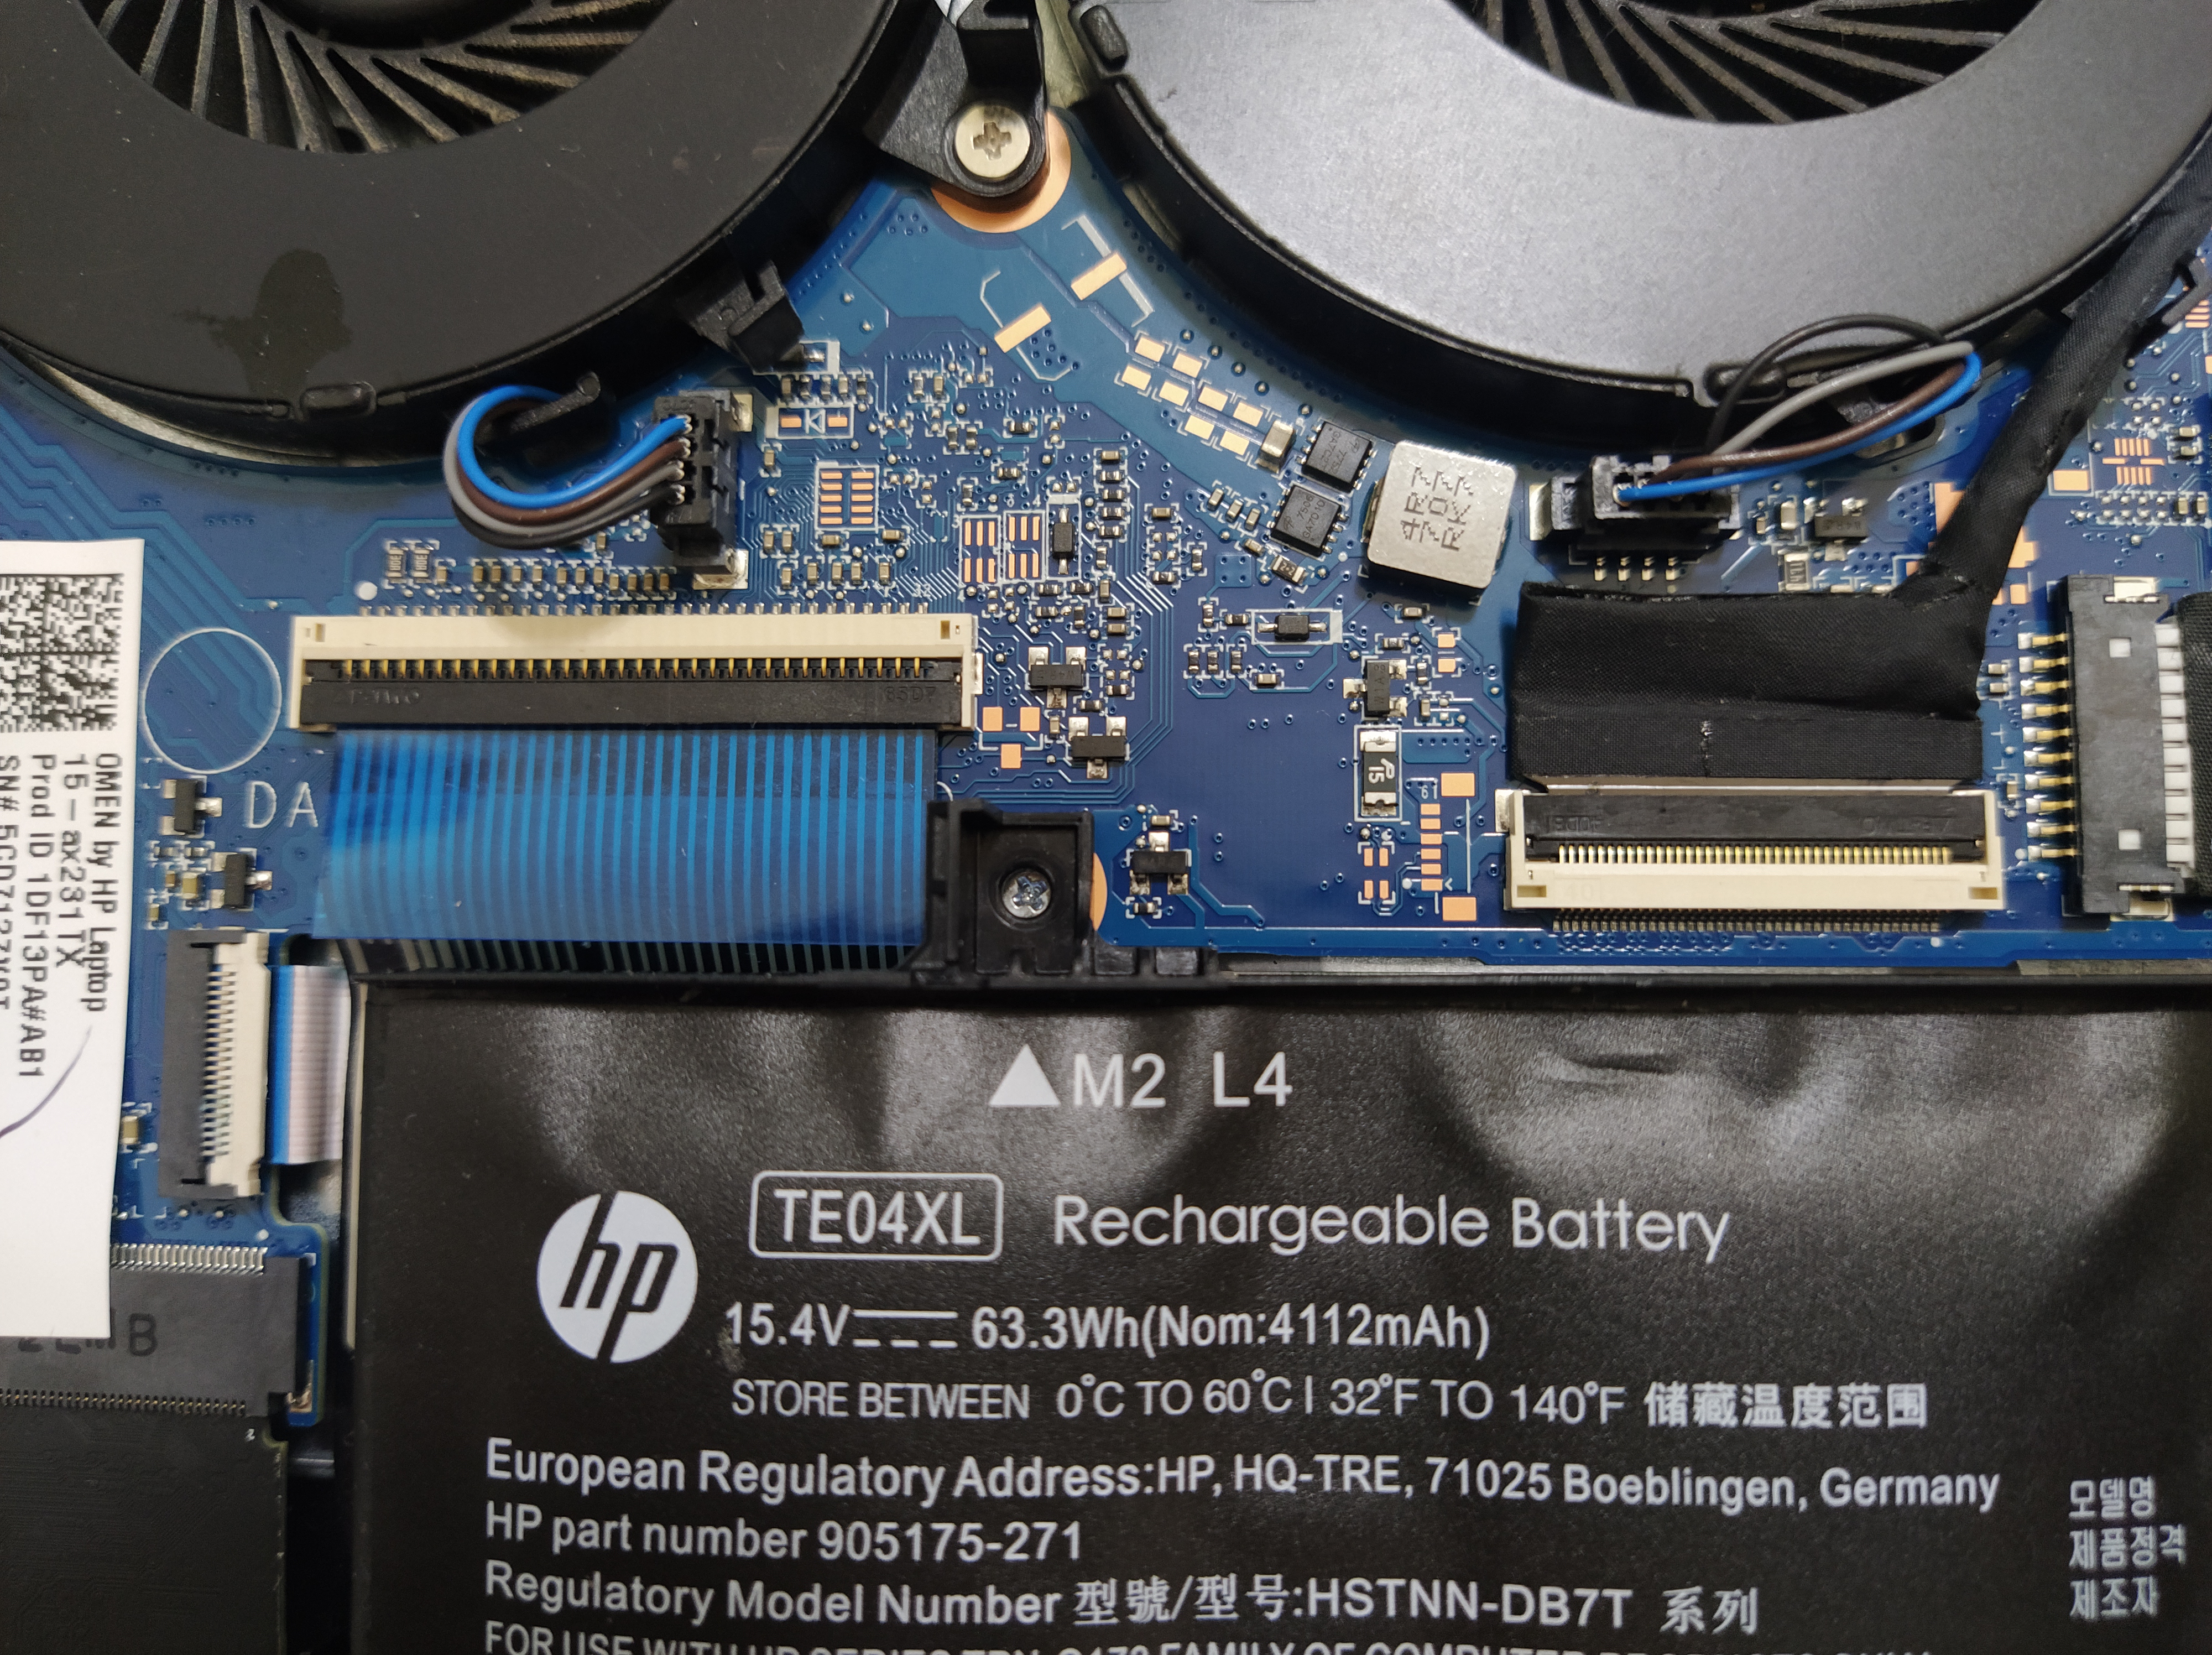
배터리를 고정하는 나사도 메인보드에 체결해놨습니다. 크게 의미는 없지만, 어차피 하드디스크와 SSD를 제거하기 위해서 배터리 커넥터를 제거해야 하니깐, 애초에 배터리를 들어내고 다시 재조립했습니다.
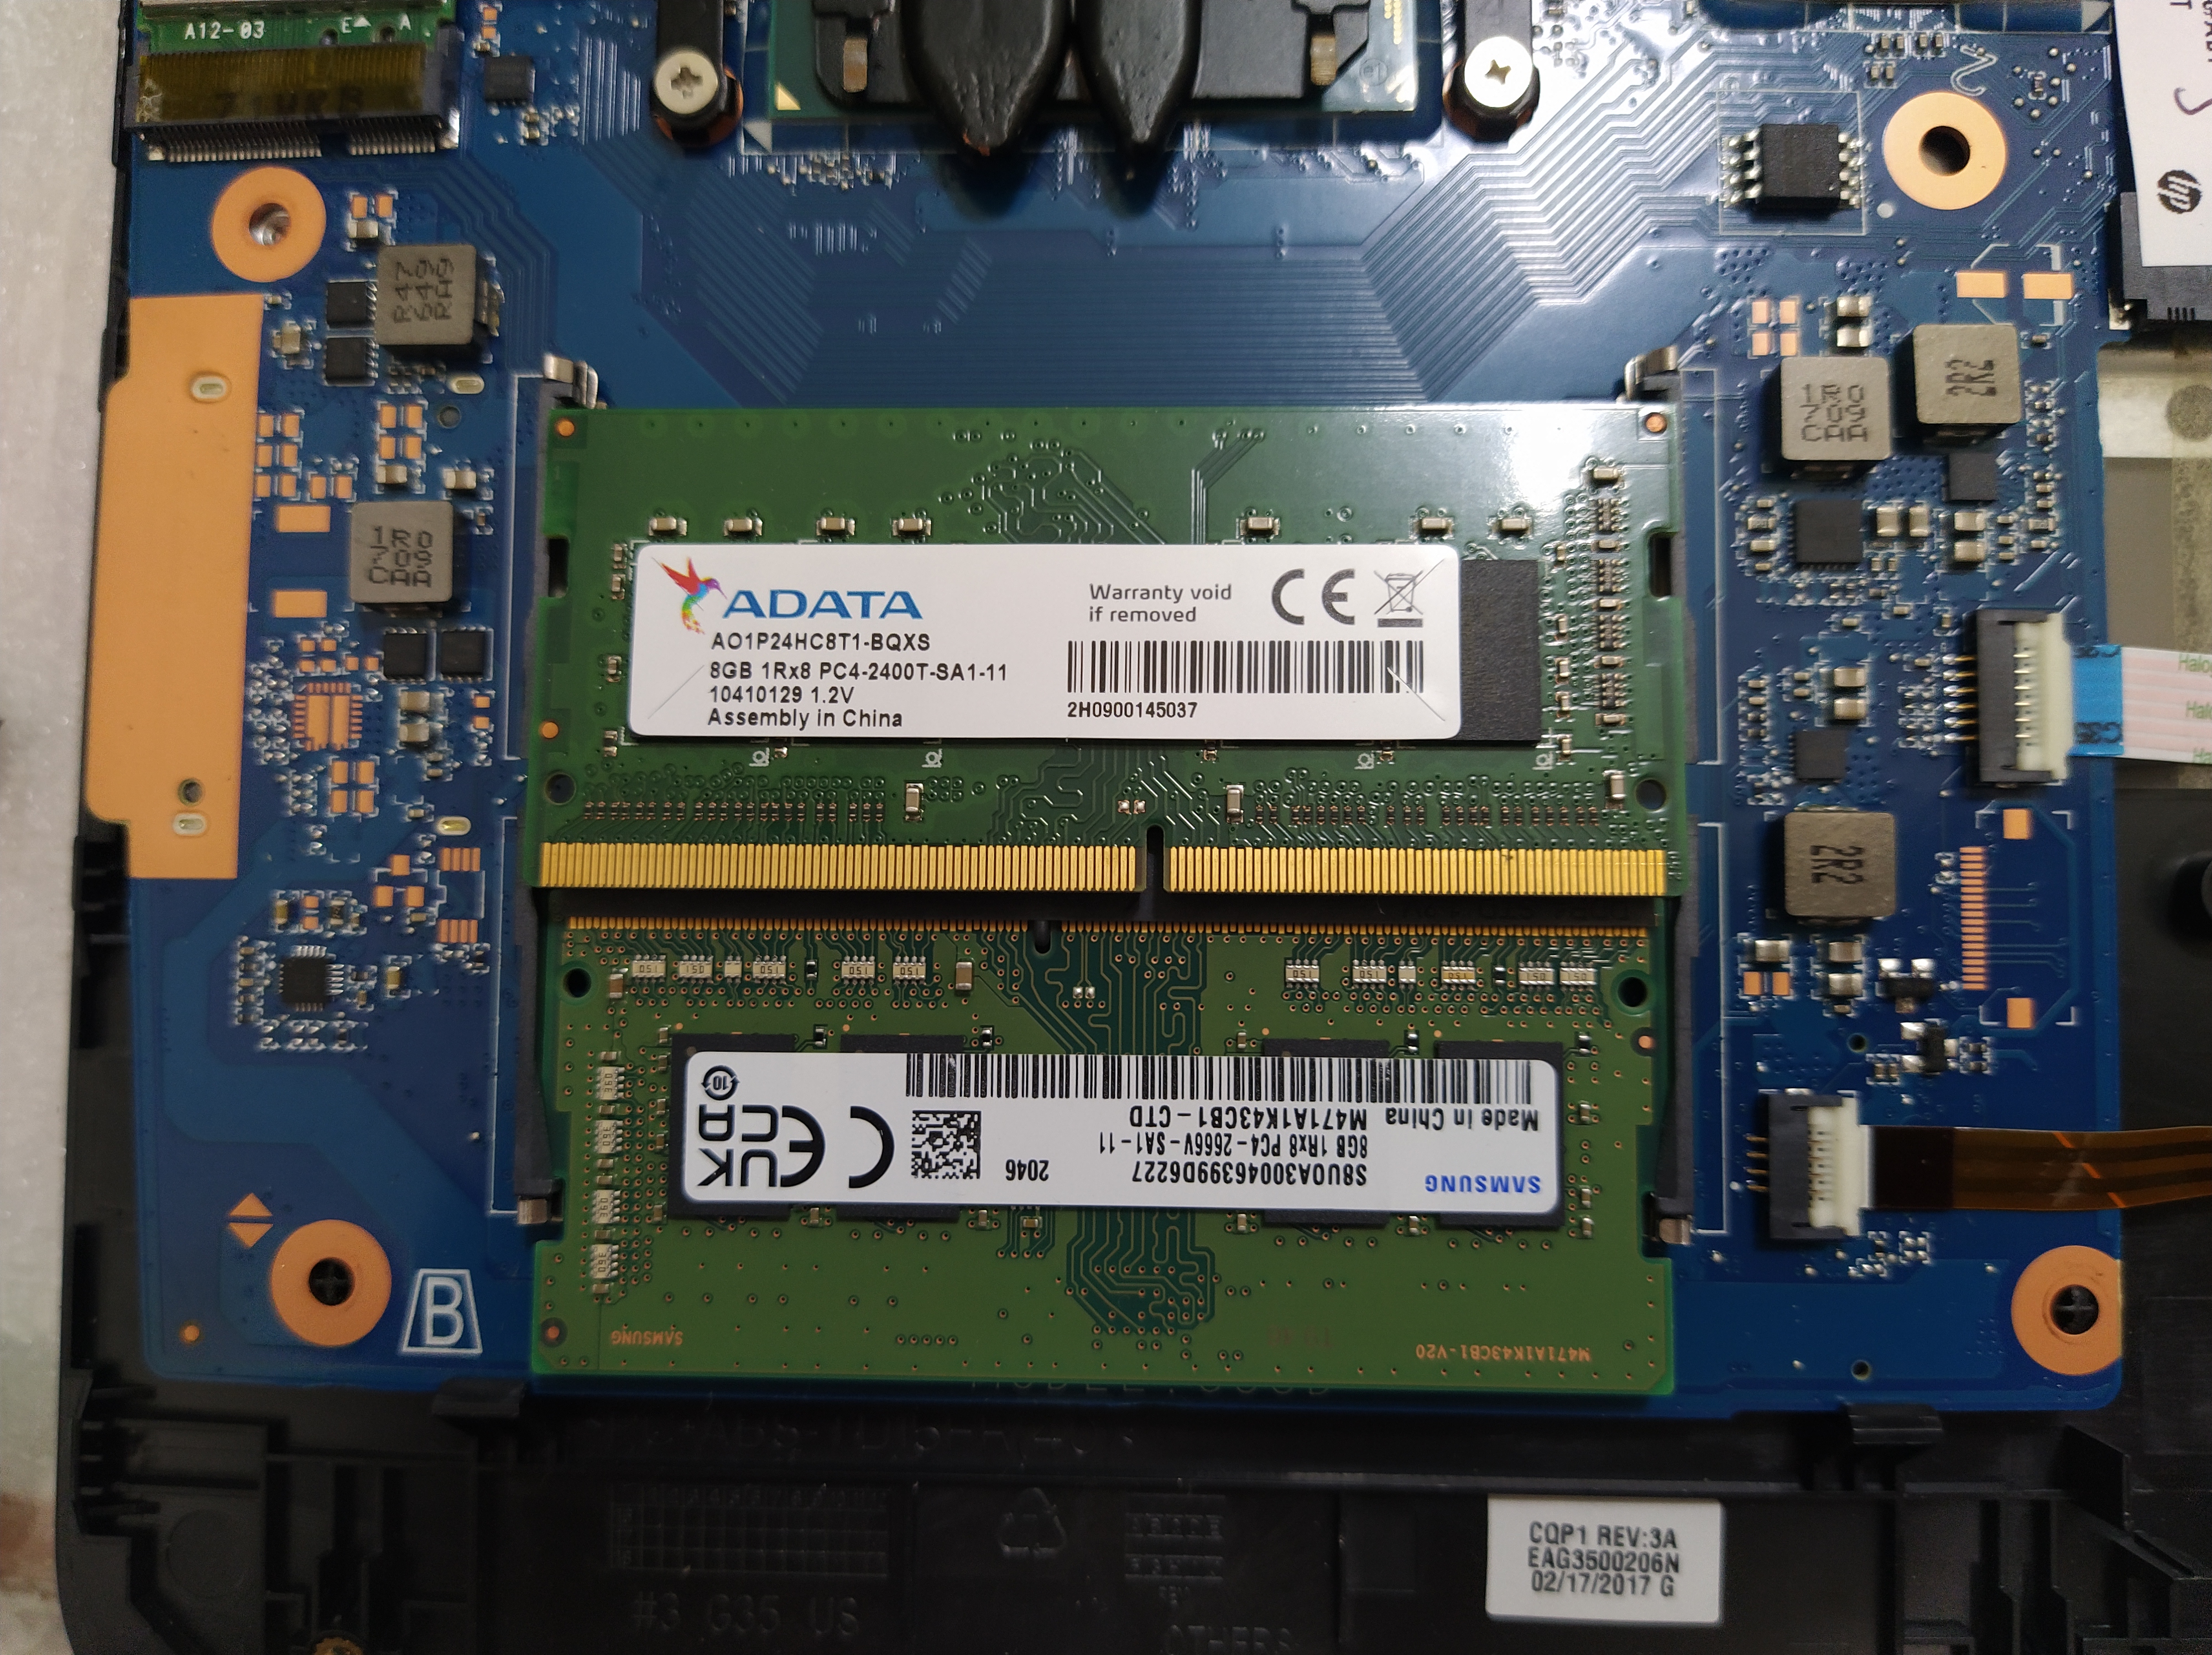
메모리는 ADATA 8기가 + 삼성 8기가 메모리가 장착된 상태네요.
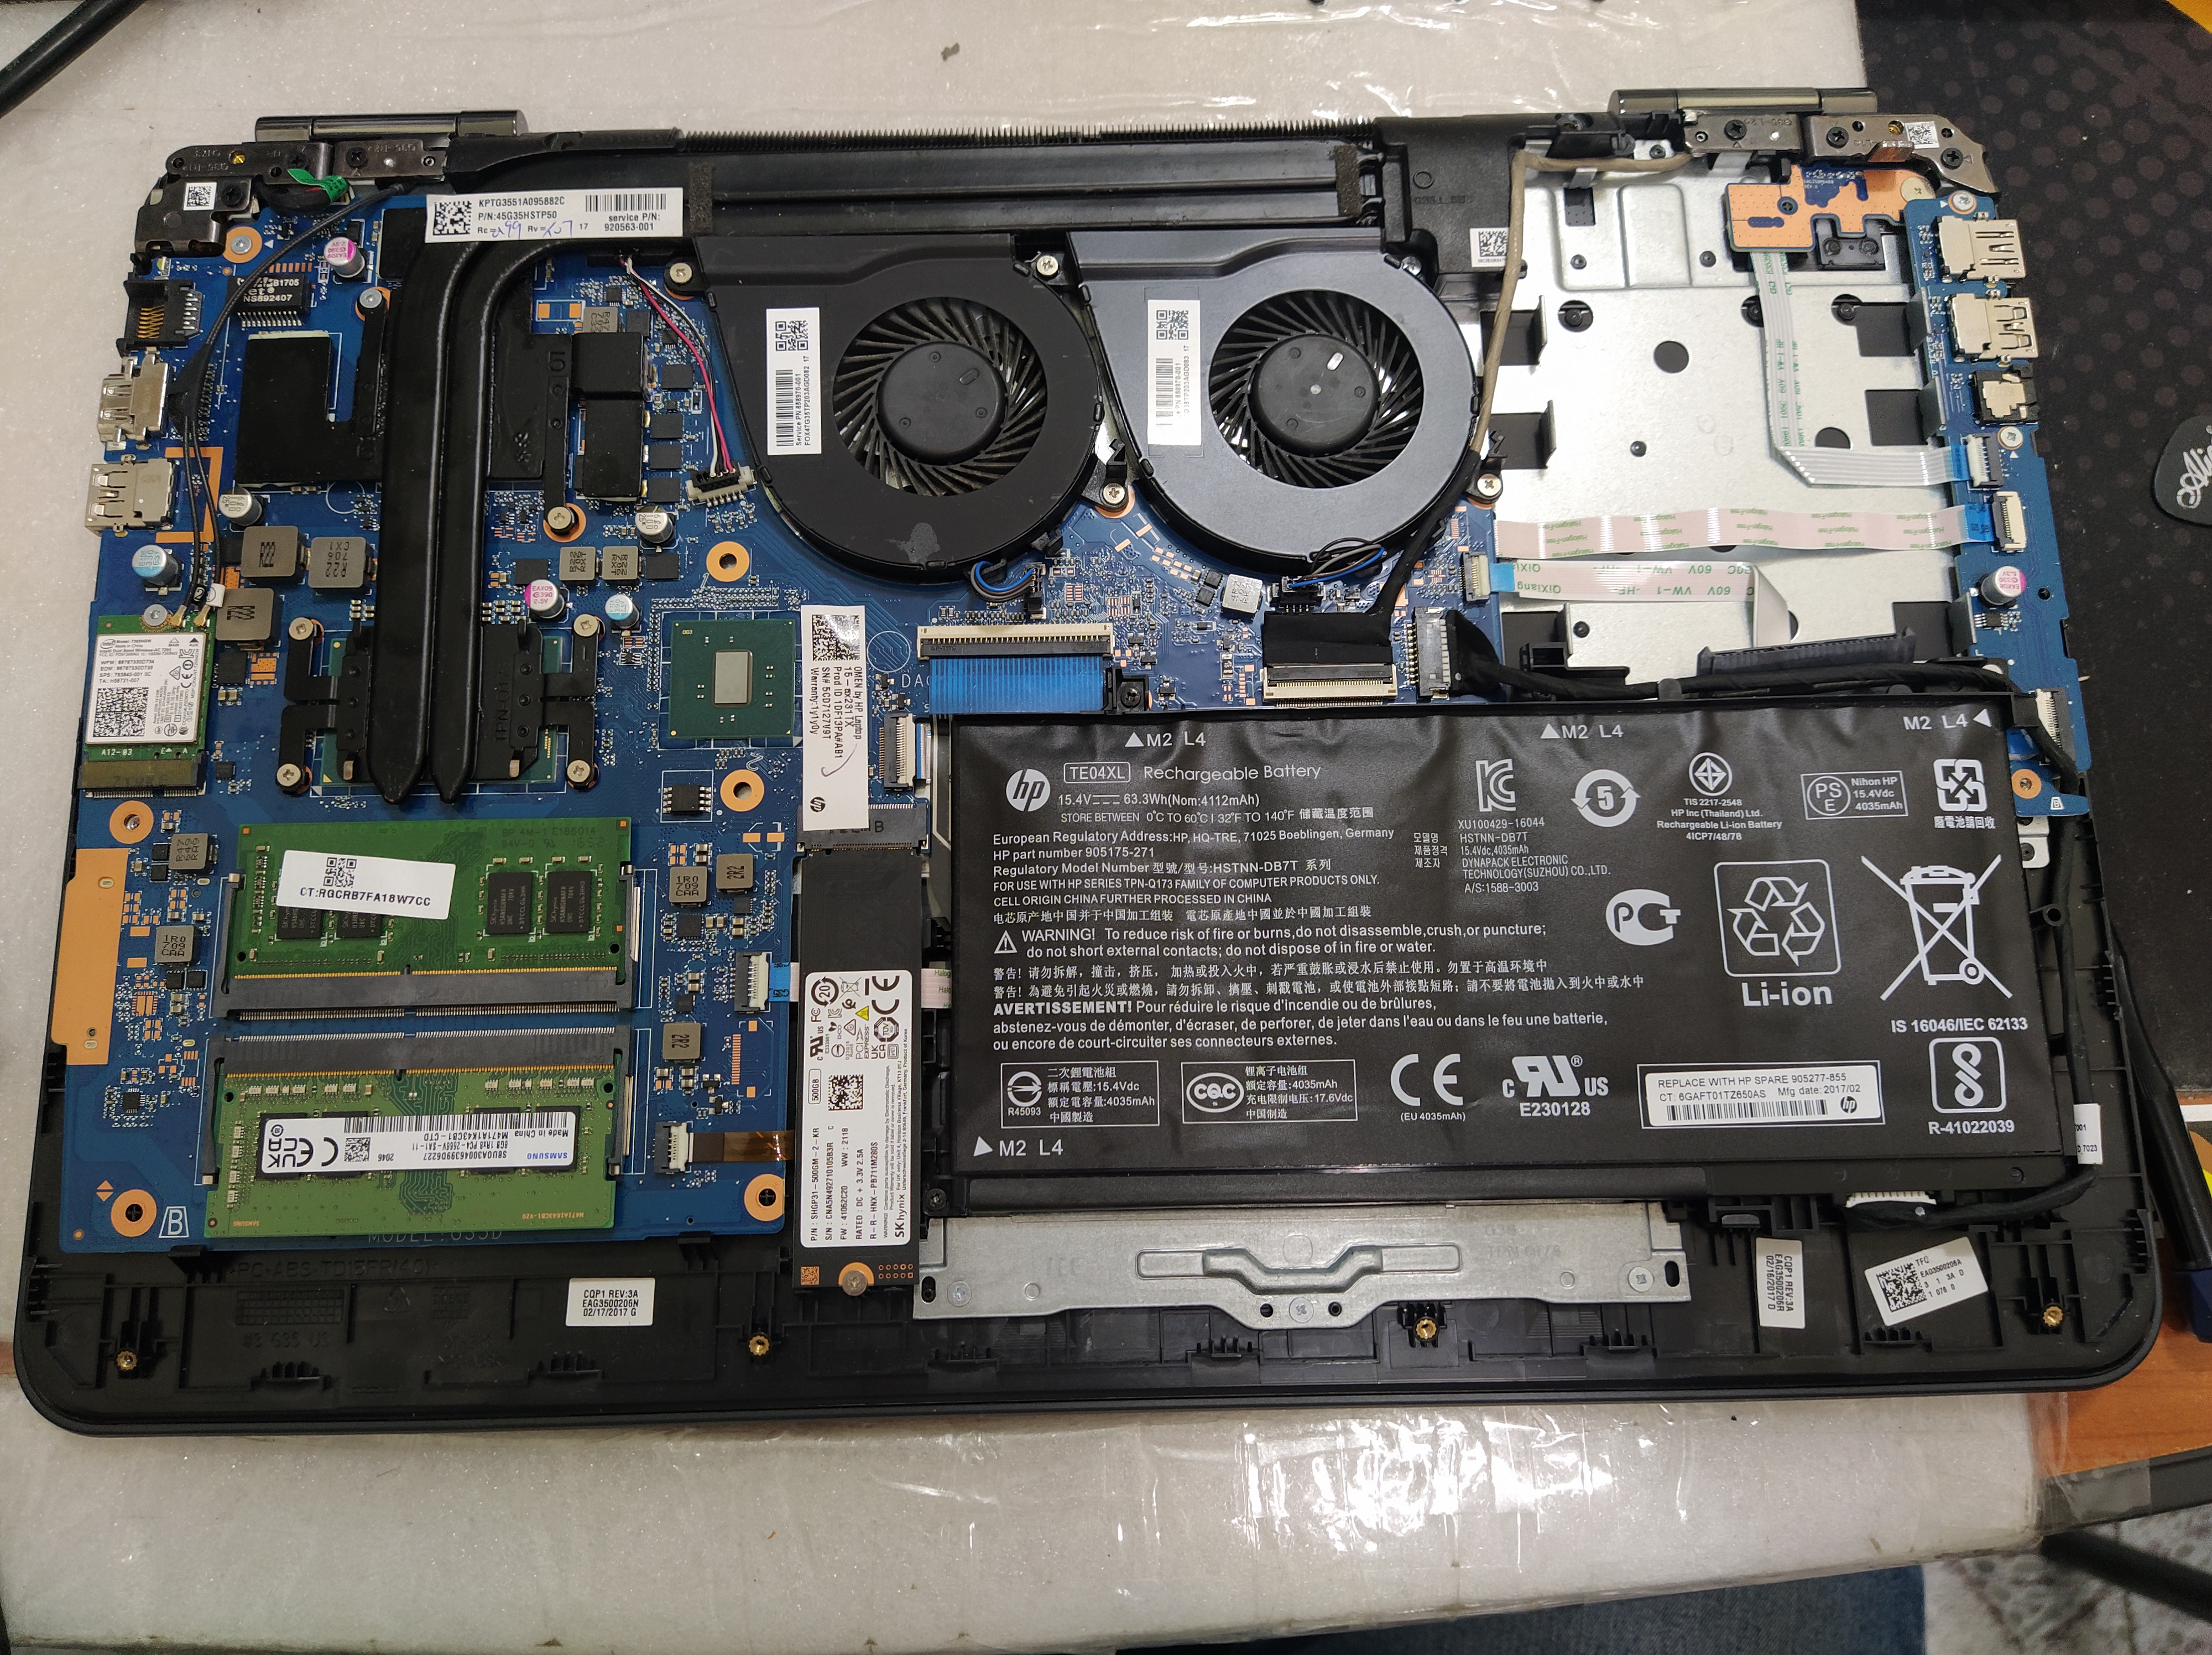
배터리를 제거하고 SSD와 HDD를 제거했습니다.
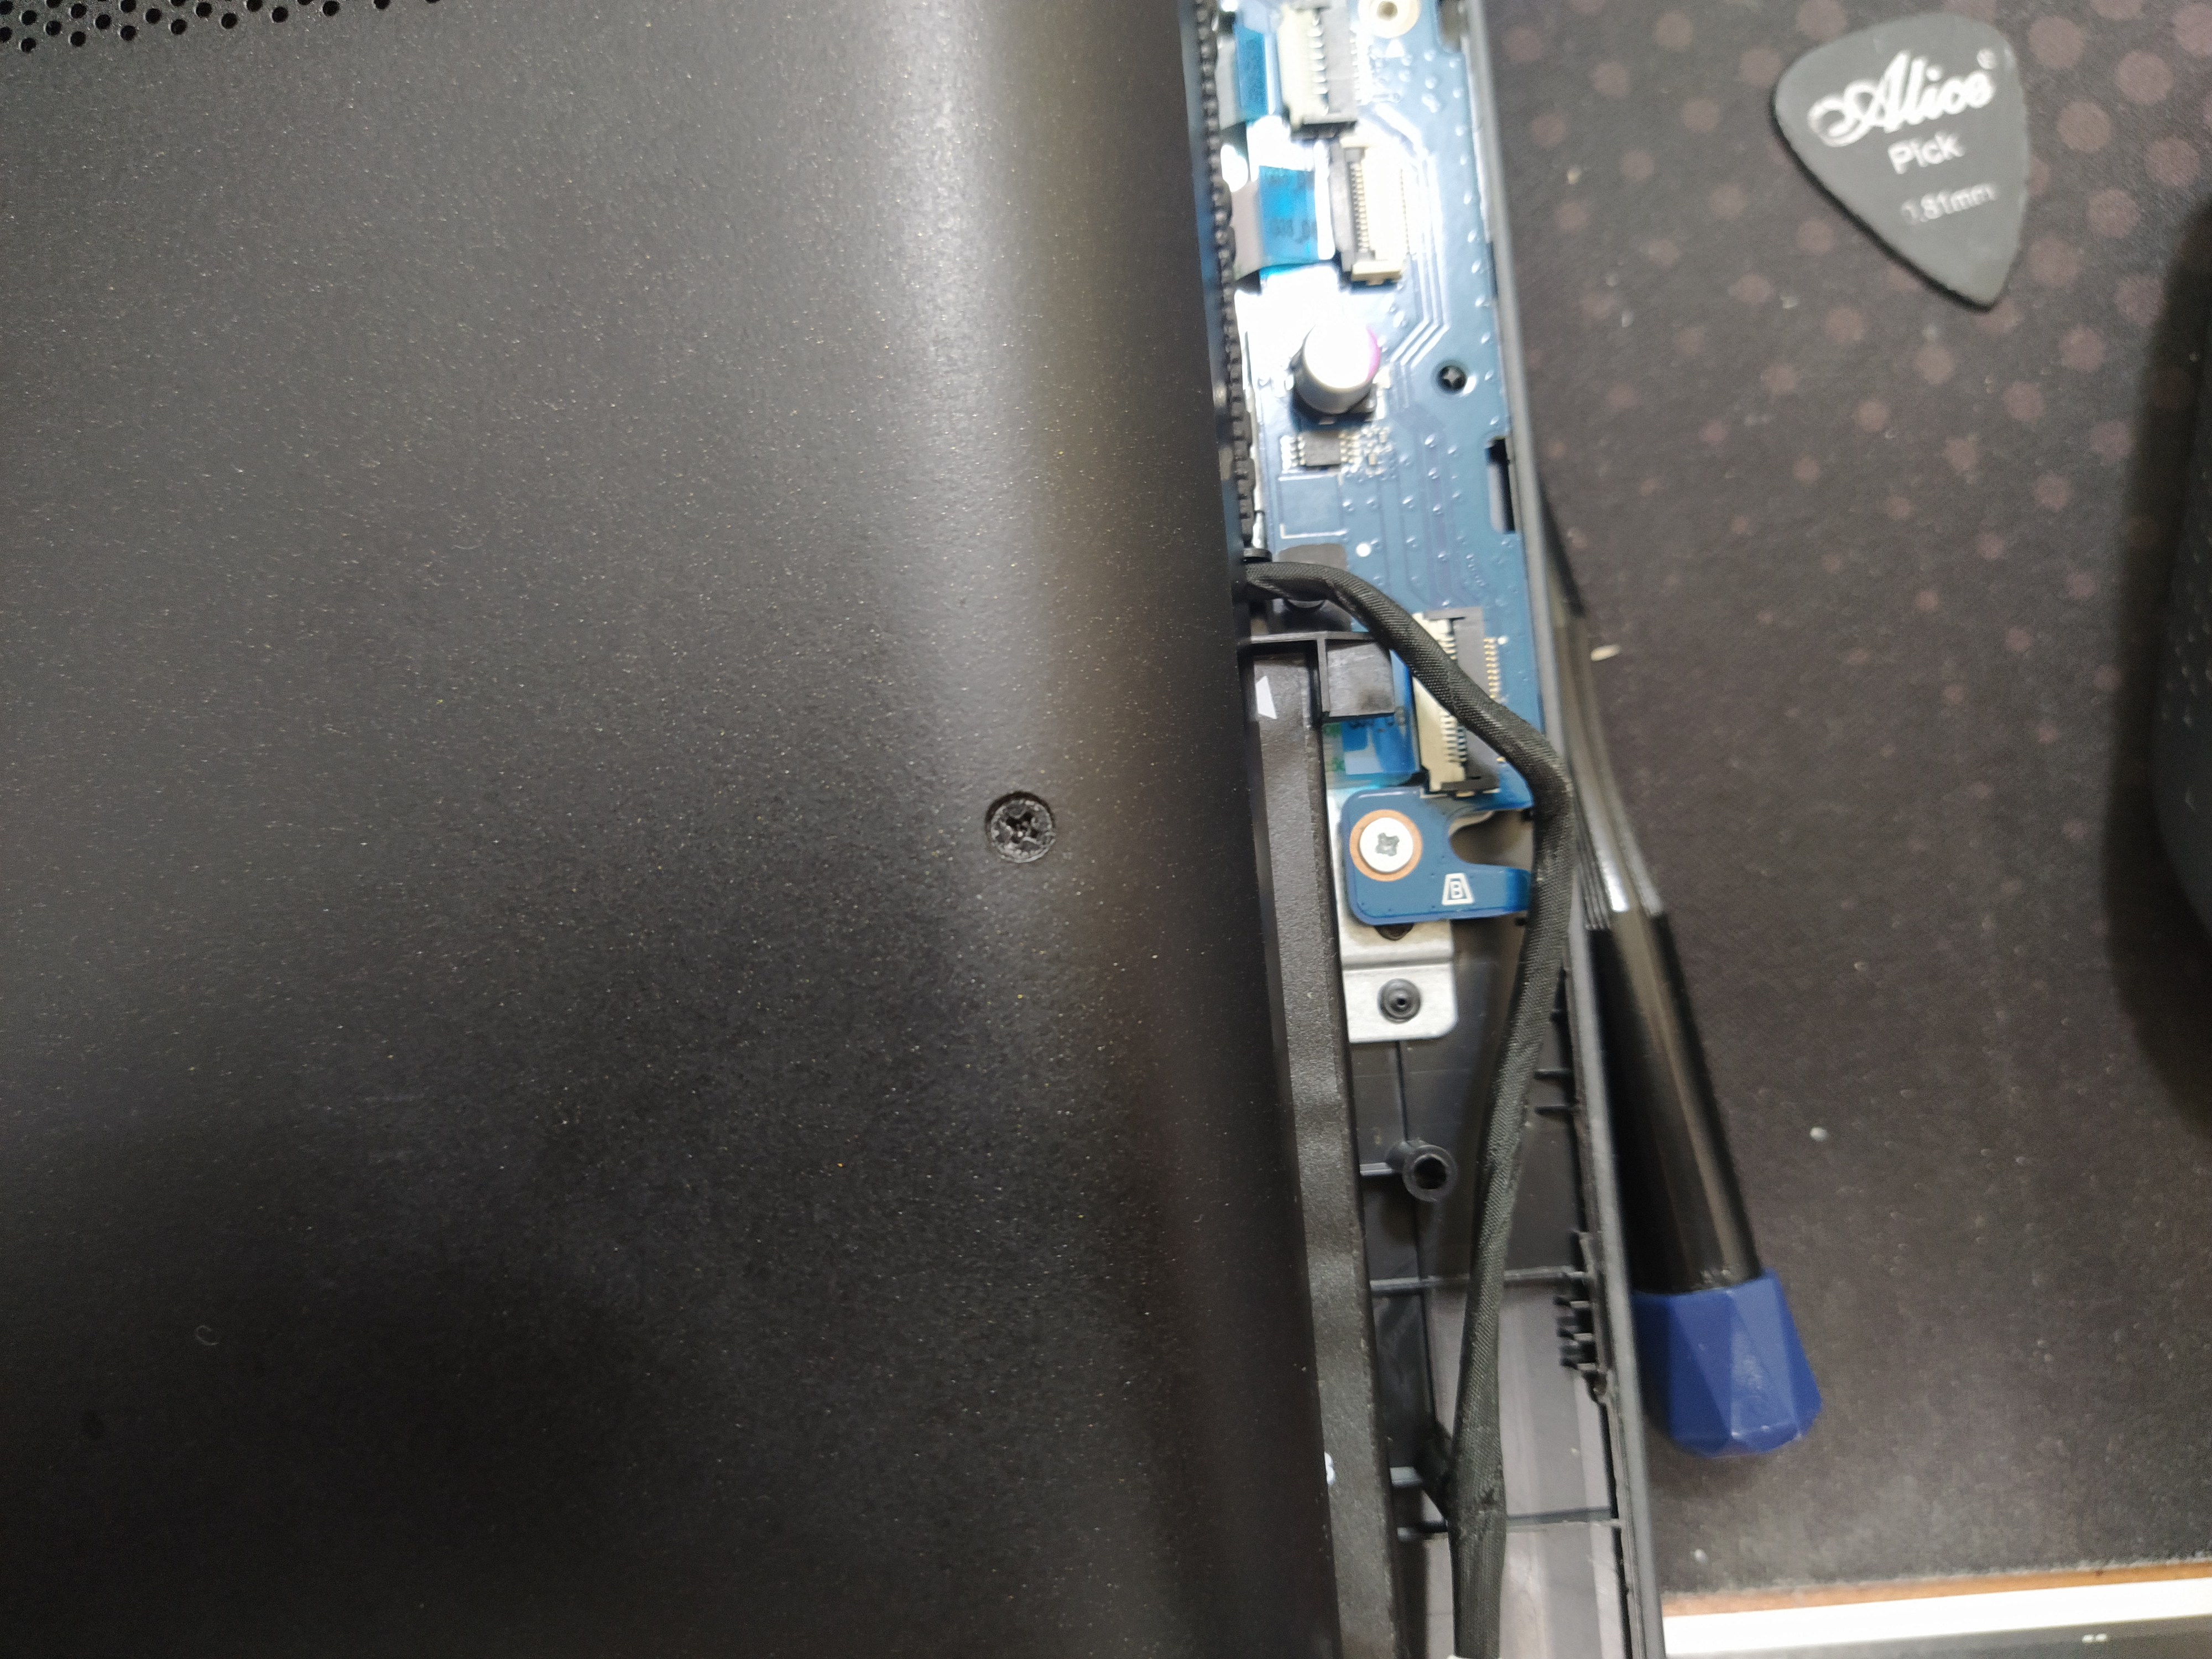
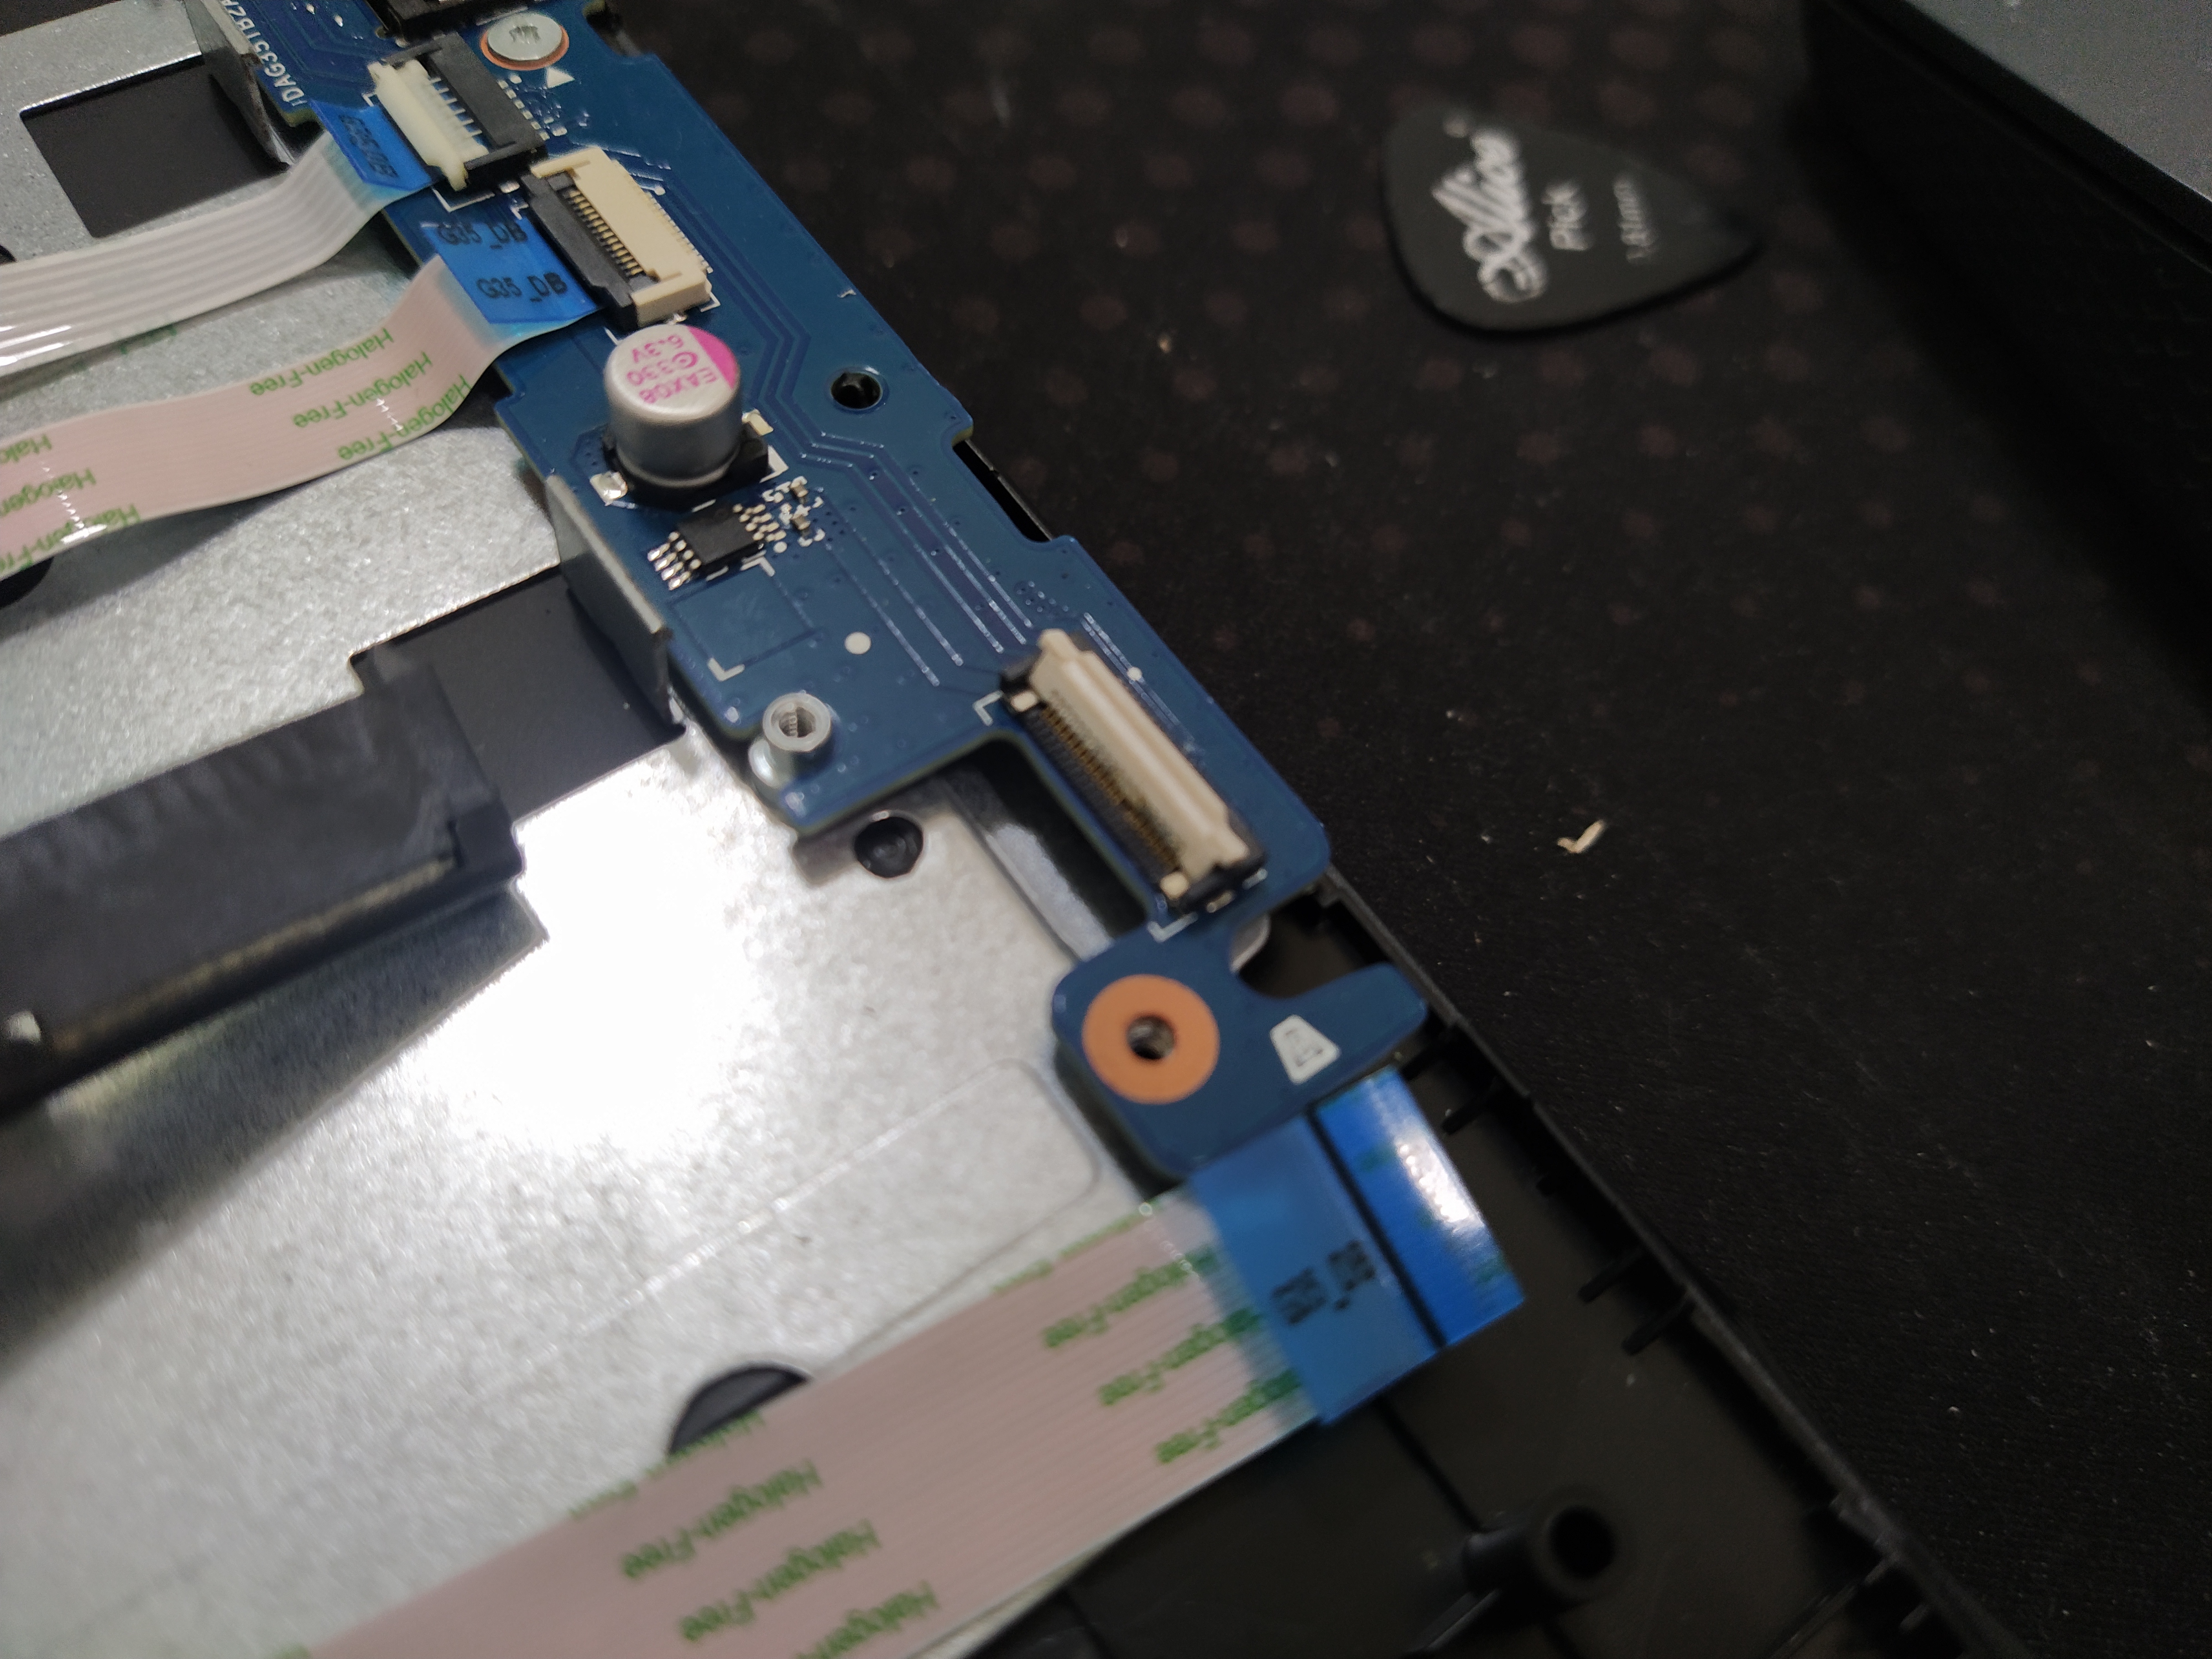
우측에 있는 작은 기판과 메인보드와 연결되는 필름형 케이블에 부식의 흔적이 보입니다.
우측의 USB 및 오디오 단자가 있는 작은 기판의 커넥터 - 부식
주요한 데이터는 하드디스크에 저장된 상태라서, 하드디스크만 제거하고 SSD와 메모리는 그대로 장착해놨습니다. 다시 배터리를 원상복귀시키고 케이스 뒤판을 다시 닫았습니다.
노트북에 조여졌던 나사를 한 곳에 모아뒀는데요. 일부 없는 나사도 있고 나사산이 굵어서 구멍에 맞지 않는 나사도 있고 그렇네요. 삼성 노트북 같은 경우에는 나사 크기가 일정한 제품이 있기는 한데요. HP나 DELL 같은 외국산 노트북은 나사 길이도 통일이 안되고 들쑥날쑥합니다. 그래도 굵기는 대부분 일정한 편이긴 하고요. 나사를 제거하고 보관할 때도 위치를 잘 파악해서 도면을 그려놓던지, 위치를 지정해서 보관하는 것이 헷갈리지 않고 노트북을 분해했다가 조립하는 방법이 아닐까 싶은데요. 개인적으로는 아래와 같이 노트북의 형태를 본뜬 동전 자석을 이용하고 있습니다. 이렇게 보관하면, 헷갈리지 않고 제 위치에 다시 나사를 꽂아줄 수가 있습니다. 노트북 기판을 분해할 때도 또 다른 자석 패드 등을 이용해서 나사를 보관시키면, 재조립할 때, 덜 헷갈립니다. (분류해도 헷갈릴 수도 있습니다. 사진, 동영상을 찍는 방법도 있고요. 각자의 방법대로)
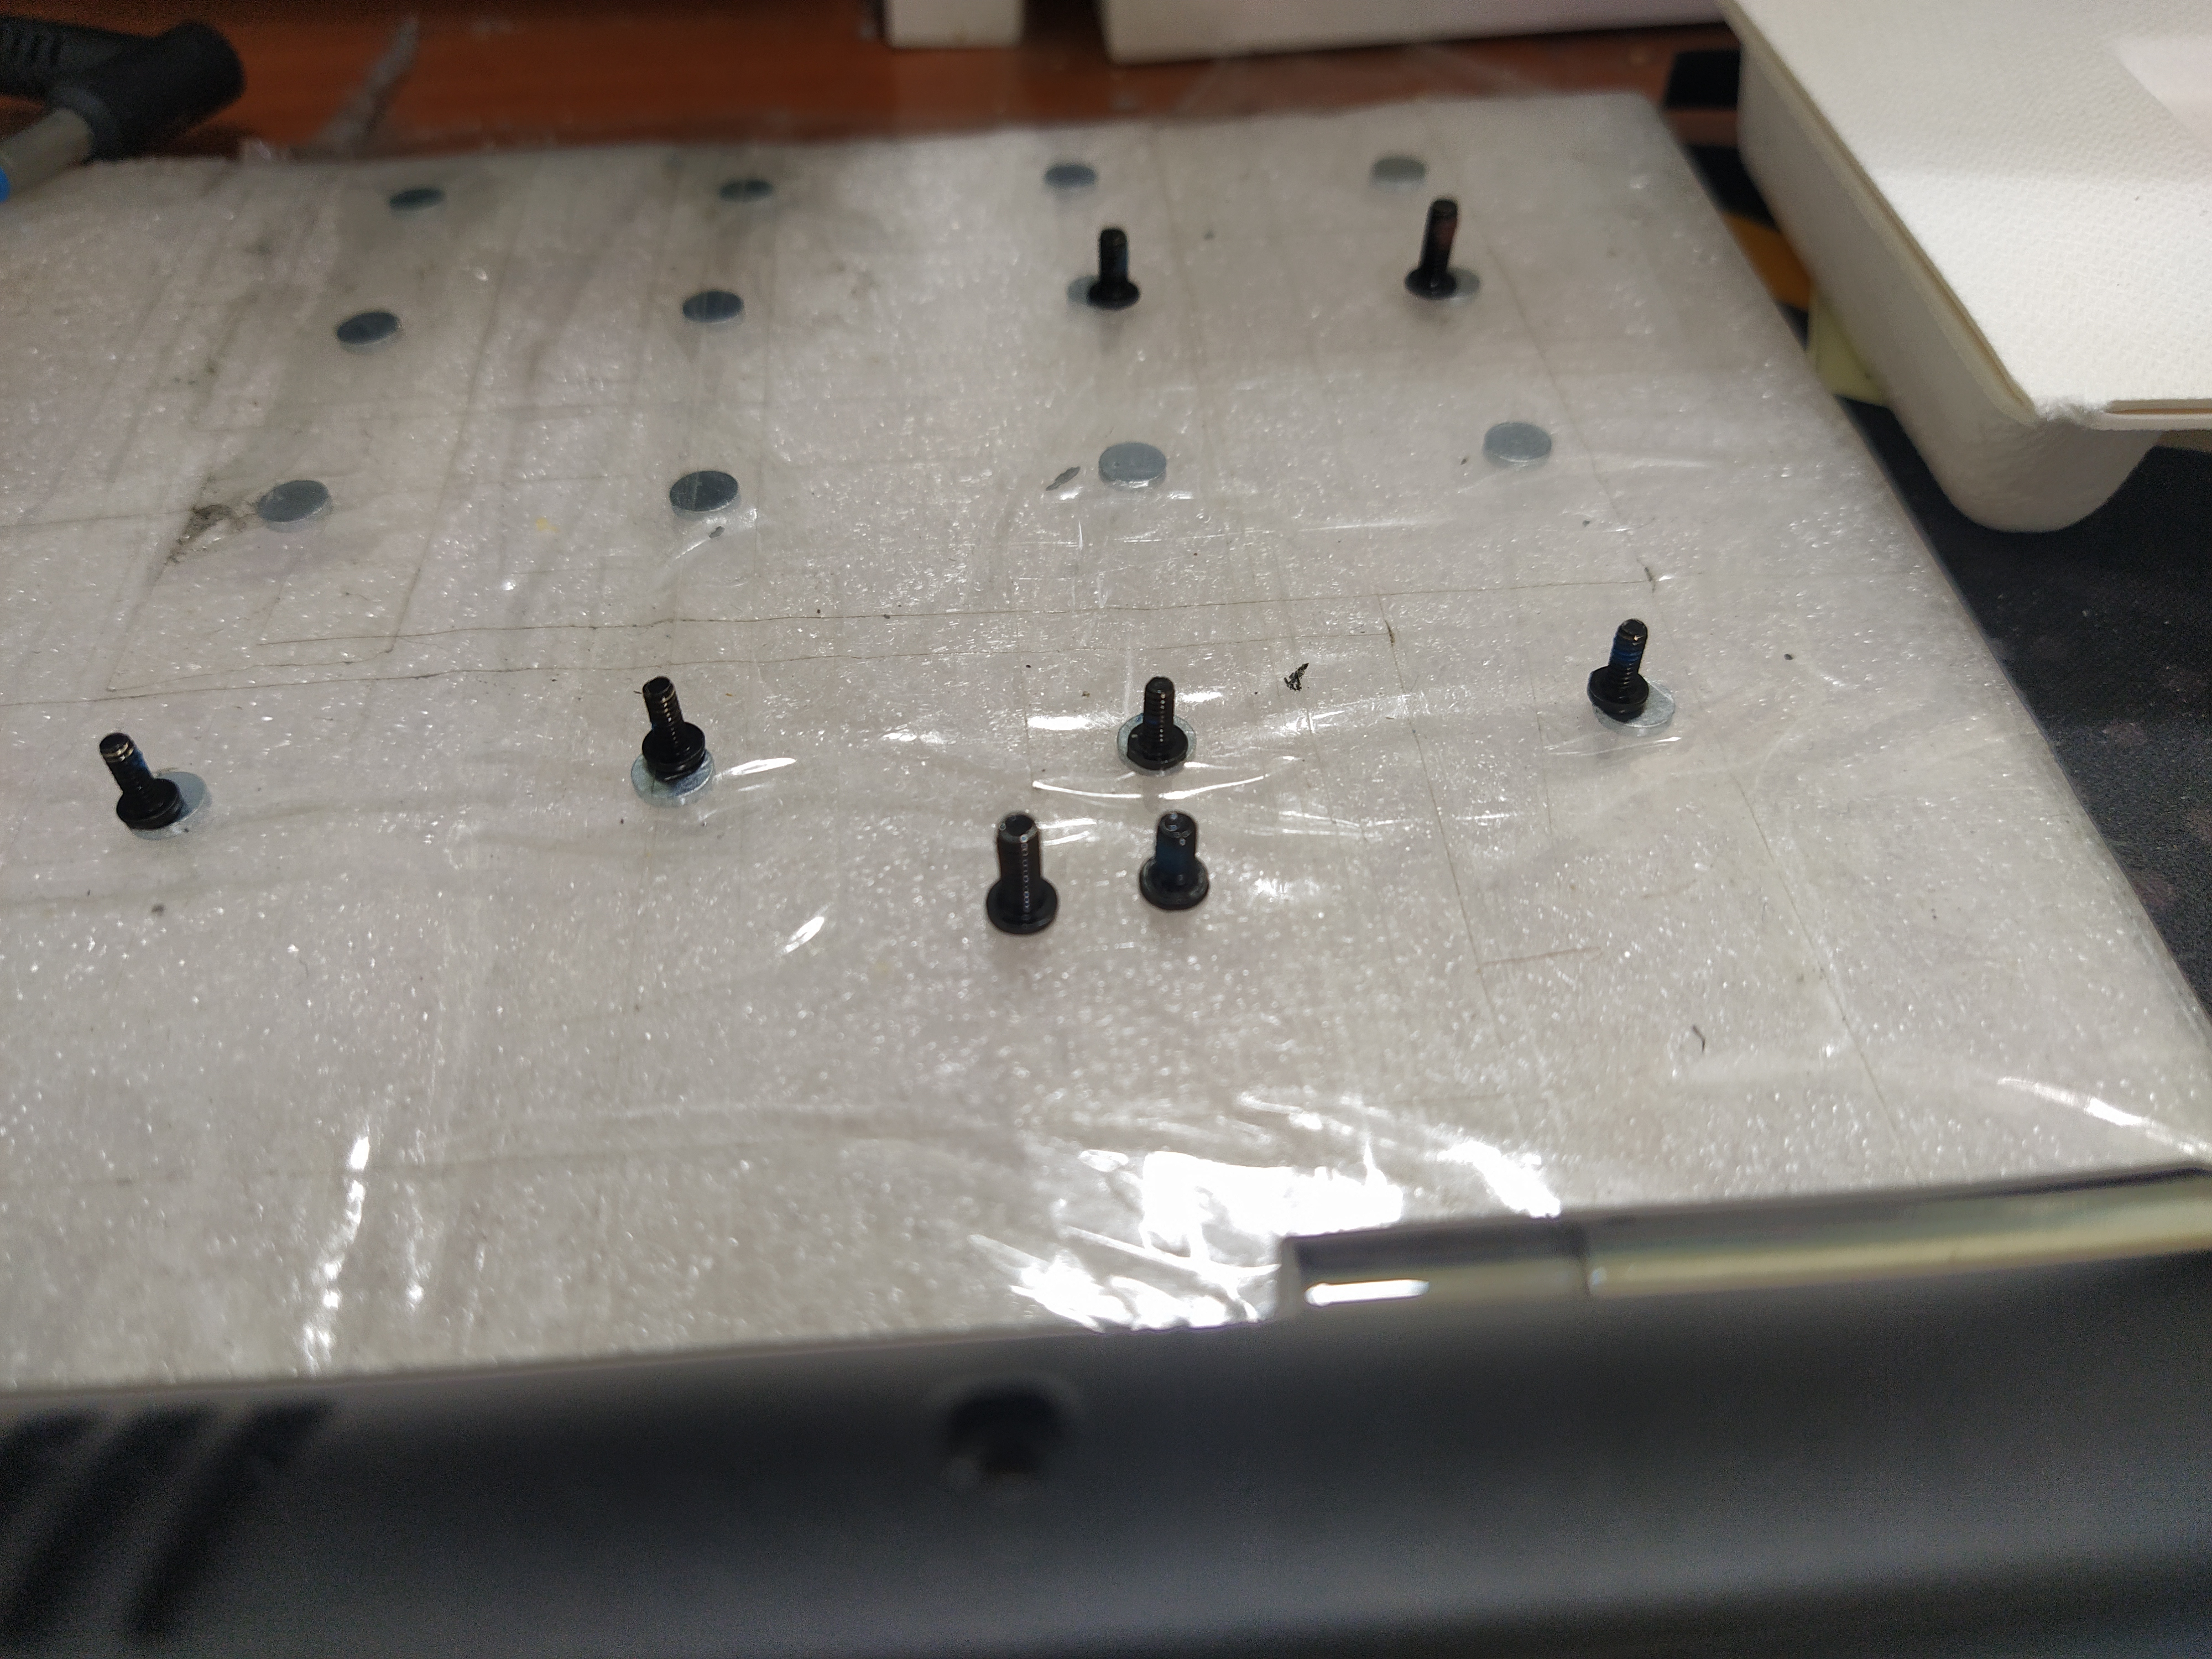
노트북에 체결되지 않은 나사는 제가 가지고 있던 나사로 대체했습니다.

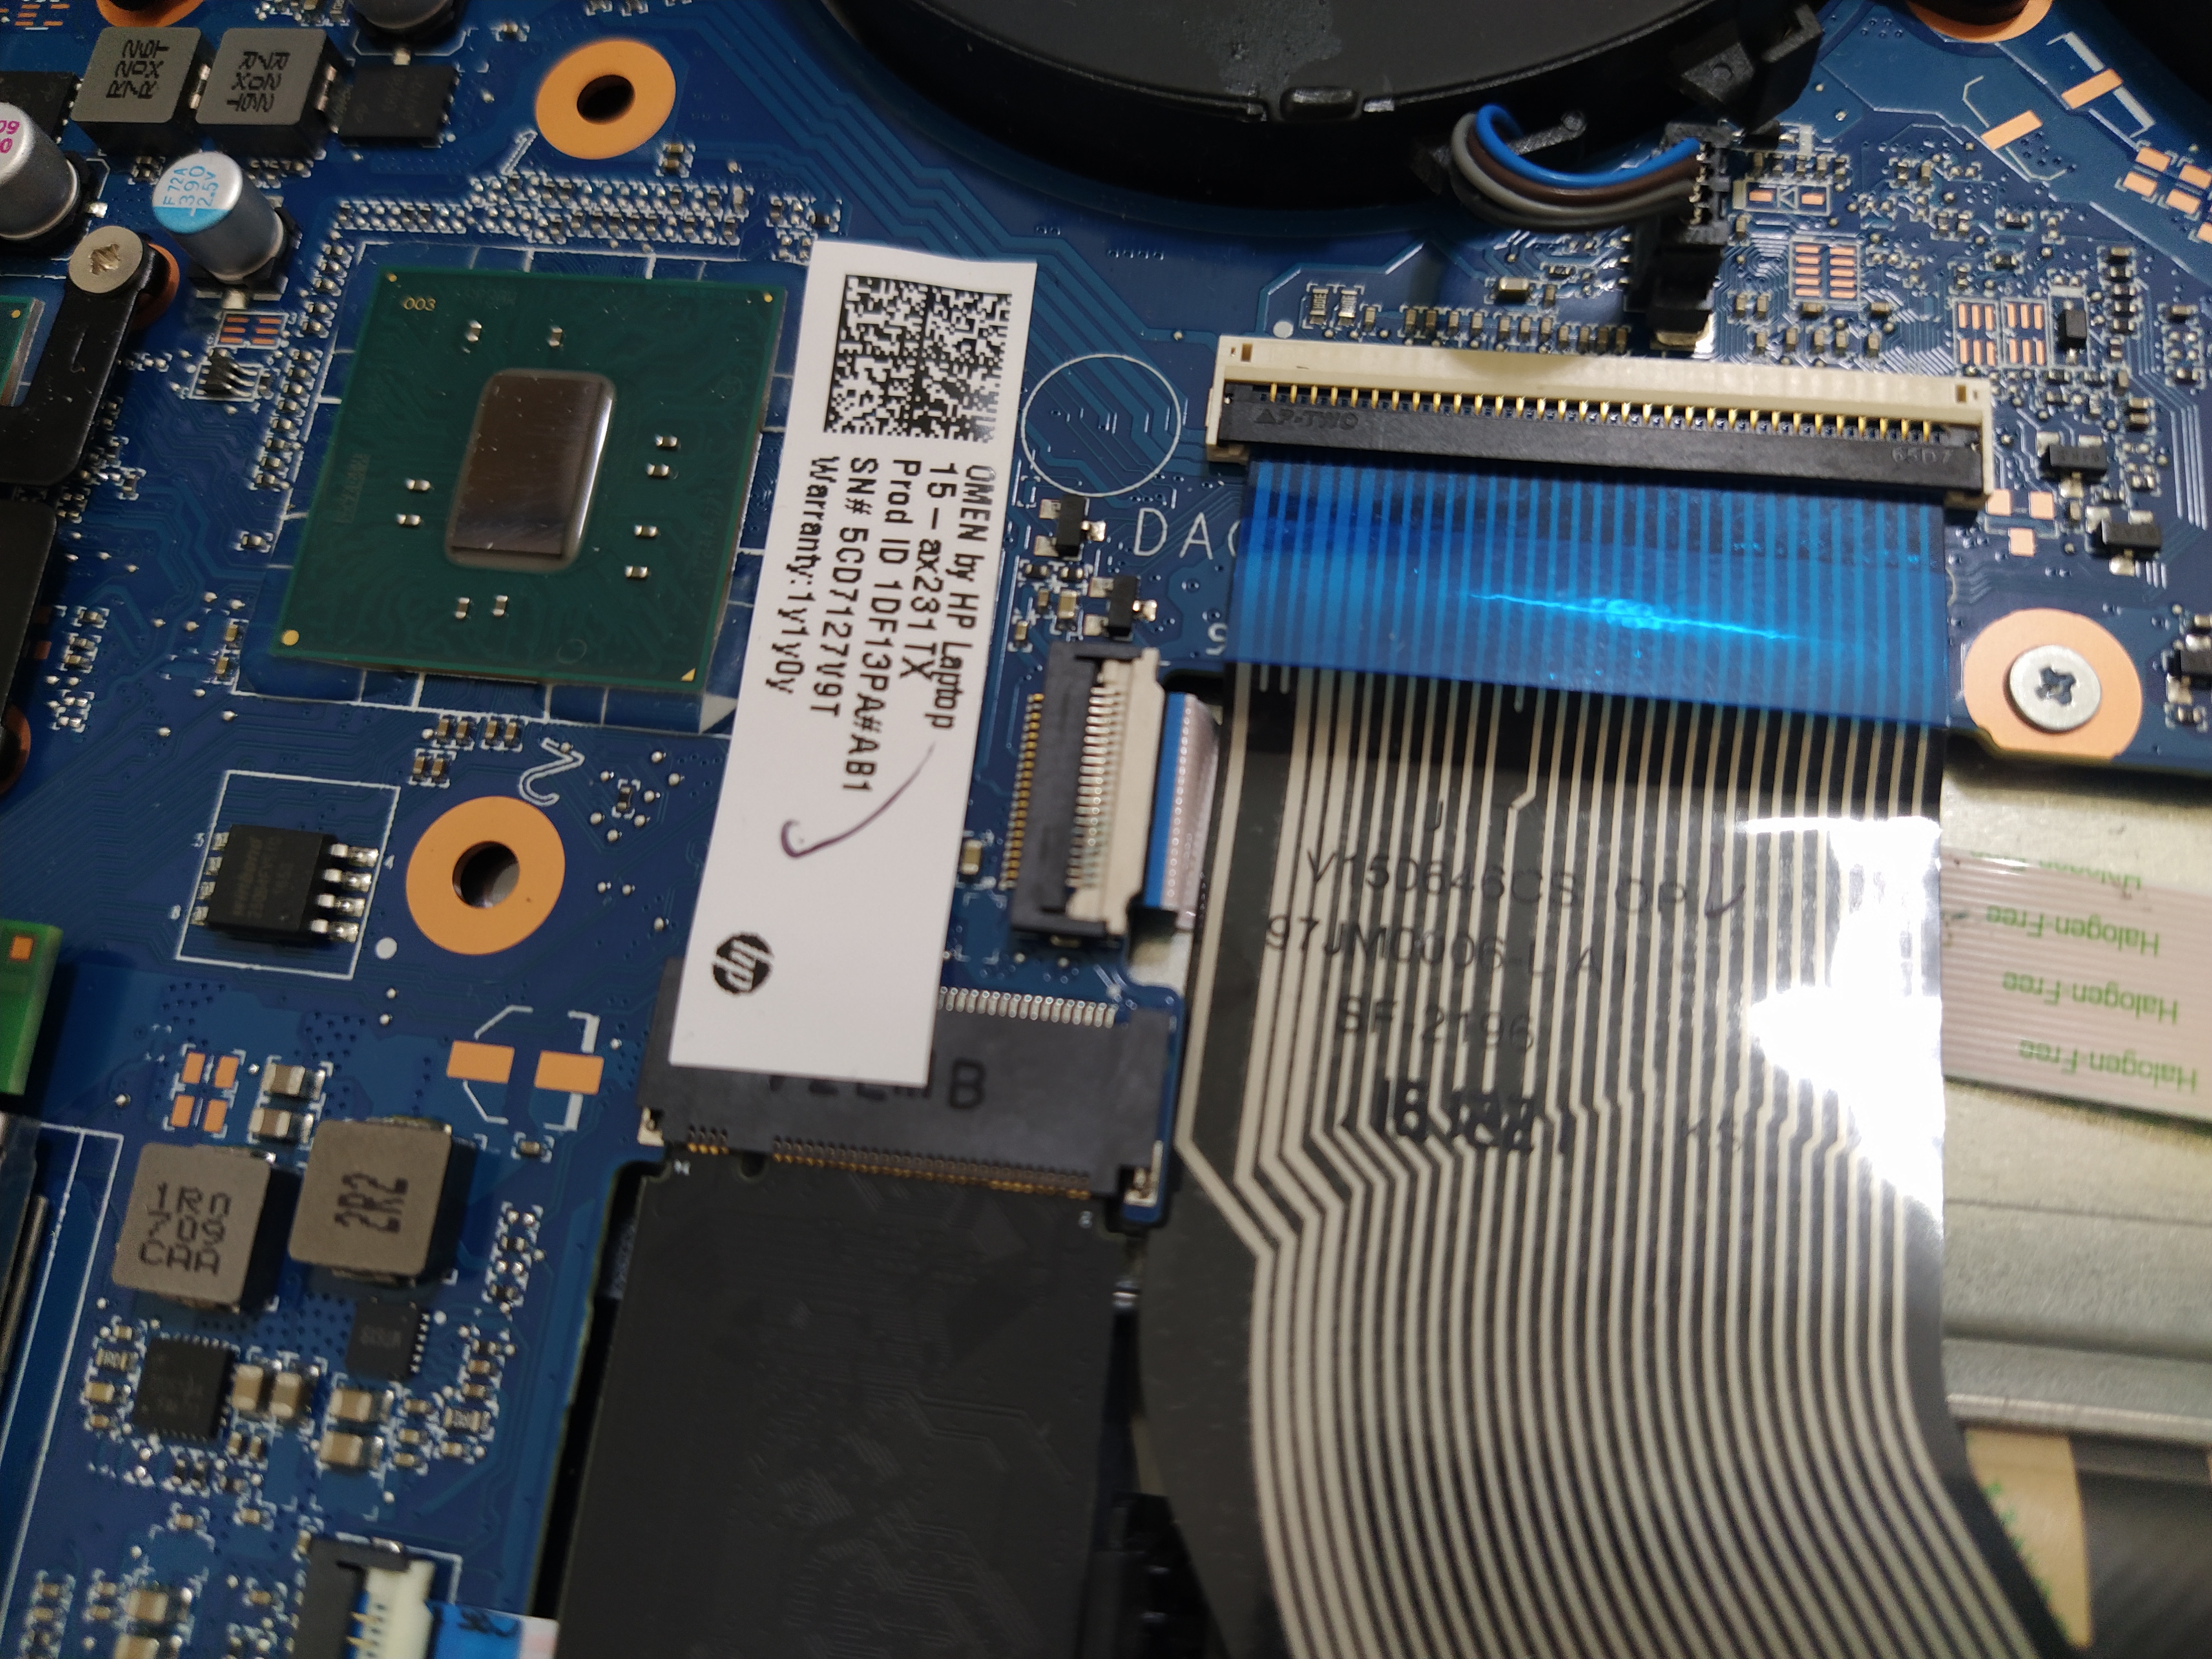
How to disassemble HP laptop (15-ax231TX)
It is a laptop eroded by rainwater inside. Repairing such a defective laptop is difficult to repair at a local computer repair shop. You should find a manufacturer's AS center with new parts/replacement accessories or a repair repair shop that repairs Yongsan or mainboard substrates. Just in time, wouldn't you know if the repairman was operating nearby? In general, it is not easy to find a computer repair shop that can repair circuits in a neighborhood. Most computer stores have no choice but to repair them by replacement of ASAY (part, part).
If you plan to get it repaired personally, you will find it on YouTube, repair your laptop, etc., watch the video, and find a reliable repair shop nearby. When water enters the laptop and corrodes, problems occur in several places, so it doesn't look easy to repair. He visited me to save only the data on my laptop. If the hard disk or SSD is not broken, you can save the data by disassembling it and connecting it to another computer. If even hard disks and SSDs are flooded and the circuit board (substrate) of the storage device is damaged by electricity, you should look for a company specializing in data recovery.
A laptop with water in it.
You've been repaired once at another repair shop. I don't think the screw's position is properly fastened. Screws are mounted outside of their original location and there are few.
HP laptop.
It is a screw hole to fix the lower plate, and the screw is stuck on the laptop main board.
If the screw is fastened incorrectly,
Likewise, the screw is already tightened in the hole where the screw should be tightened, so the external screw is not tightened and it is not tightened even though it is not his partner.
Screw. Thick screw that doesn't fit the hole.
There is no tightened screw on the other side.
Lost screw.
I'm looking for a screw in the middle of the laptop.
Check the hole of the screw hole.
When I opened the laptop, I could see traces of water flowing and metal oxidation (blue-green material) as below.
The back of my laptop.
The substrate cable connected to the USB port on the left can also be seen as worn out from the related image.
Cable connector. The rotten part.
The laptop's battery is swollen due to swelling.
Battery swelling.
The screw on the back plate is not locked because the screw is already fastened to the main board as shown below.
Battery cable.
The screw that fixes the battery is also fastened to the main board. It doesn't mean much, but I had to remove the battery connector to remove the hard disk and SSD anyway, so I removed the battery in the first place and reassembled it.
Fastening the battery screw wrong.
The memory is equipped with 8 Giga ADATA + 8 Giga Samsung memory.
8GB of DDR4 memory.
The battery was removed and SSD and HDD were removed.
The battery is removed.
There are traces of corrosion on the small substrate on the right and the film-type cable connected to the main board.
Corrosive port.
Connector of a small substrate with USB and audio terminals on the right - corrosion
Corrosive port.
The main data is stored on the hard disk, so only the hard disk is removed and the SSD and memory are installed as it is. I returned the battery to its original state and closed the back of the case again.
HP laptop is disassembled.
I put the screws that had been tightened on my laptop in one place. Some screws are missing, and some screws are thick, so they don't fit the hole. In the case of Samsung laptops, there are products with a constant screw size. Foreign laptops such as HP and DELL do not have unified screw lengths. Still, the thickness is mostly constant. Even when removing and storing screws, I think it's a way to disassemble and assemble the laptop without being confused to find the location and draw a drawing or to designate and store the location. Personally, I use a electromagnet modeled after the form of a laptop as follows. If you keep it like this, you can insert the screw back into place without getting confused. When disassembling a laptop board, if you store screws using another magnetic pad, it's less confusing when you reassemble it. (It can be confusing even if you classify it.) There's also a way to take pictures and videos. In your own way)
How to organize screws.
The screw that wasn't fastened to the laptop was replaced with the screw I had.
Extra screw.
'컴퓨터수리' 카테고리의 다른 글
| 계정에 로그인할 수 없음 (0) | 2021.11.11 |
|---|---|
| 불량난 파워서플라이 폐기 (0) | 2021.11.05 |
| 2021년 10월 25일 오전11시 ~ KT 인터넷 접속 안됨 (0) | 2021.10.25 |
| 손님께서 찍어오신 오류 증상과 인텔 CPU 쿨러 불량 교체 (0) | 2021.10.21 |
| 무뽑기된 AMD 3900X CPU (0) | 2021.10.20 |


